
Initial Onboarding and Environment Configuration
Quick start guide for setting up [Ai]levate Revenue Recovery, with step-by-step instructions for both cloud and on-premise deployments.
This guide provides detailed instructions for Customer Administrators to complete the initial onboarding process for [Ai]levate Revenue Recovery. Whether you're setting up a cloud environment or an on-premise deployment, you'll find step-by-step guidance to get your system up and running quickly.
Prerequisites
Before beginning the onboarding process, ensure you have:
- Reviewed the System Requirements
- Received your welcome email with administrator credentials and access token
- Gathered your organization's EHR system details (for integration setup)
Note: The onboarding process must be completed before you can perform your First-Time Login. The onboarding portal is accessed directly from the "Get Started" link in your welcome email.
Accessing the Onboarding Portal
- Check your email for the welcome message from [Ai]levate Revenue Recovery
When you receive your welcome email, it will look like this:
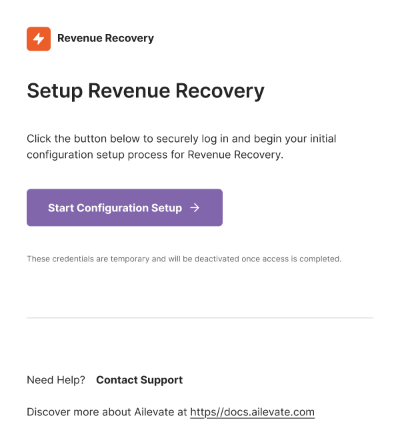
The email contains:
- A secure "Start Configuration Setup" button to begin the process
- Important notice about temporary credentials
- Support contact information and documentation links at https://docs.ailevate.com
- Access the appropriate onboarding portal based on your deployment type:
Cloud Environment Setup
Follow these steps to configure your cloud environment:
For Cloud Deployment
Start the Onboarding Process
Click the "Get Started" link in the email to access the cloud onboarding portal
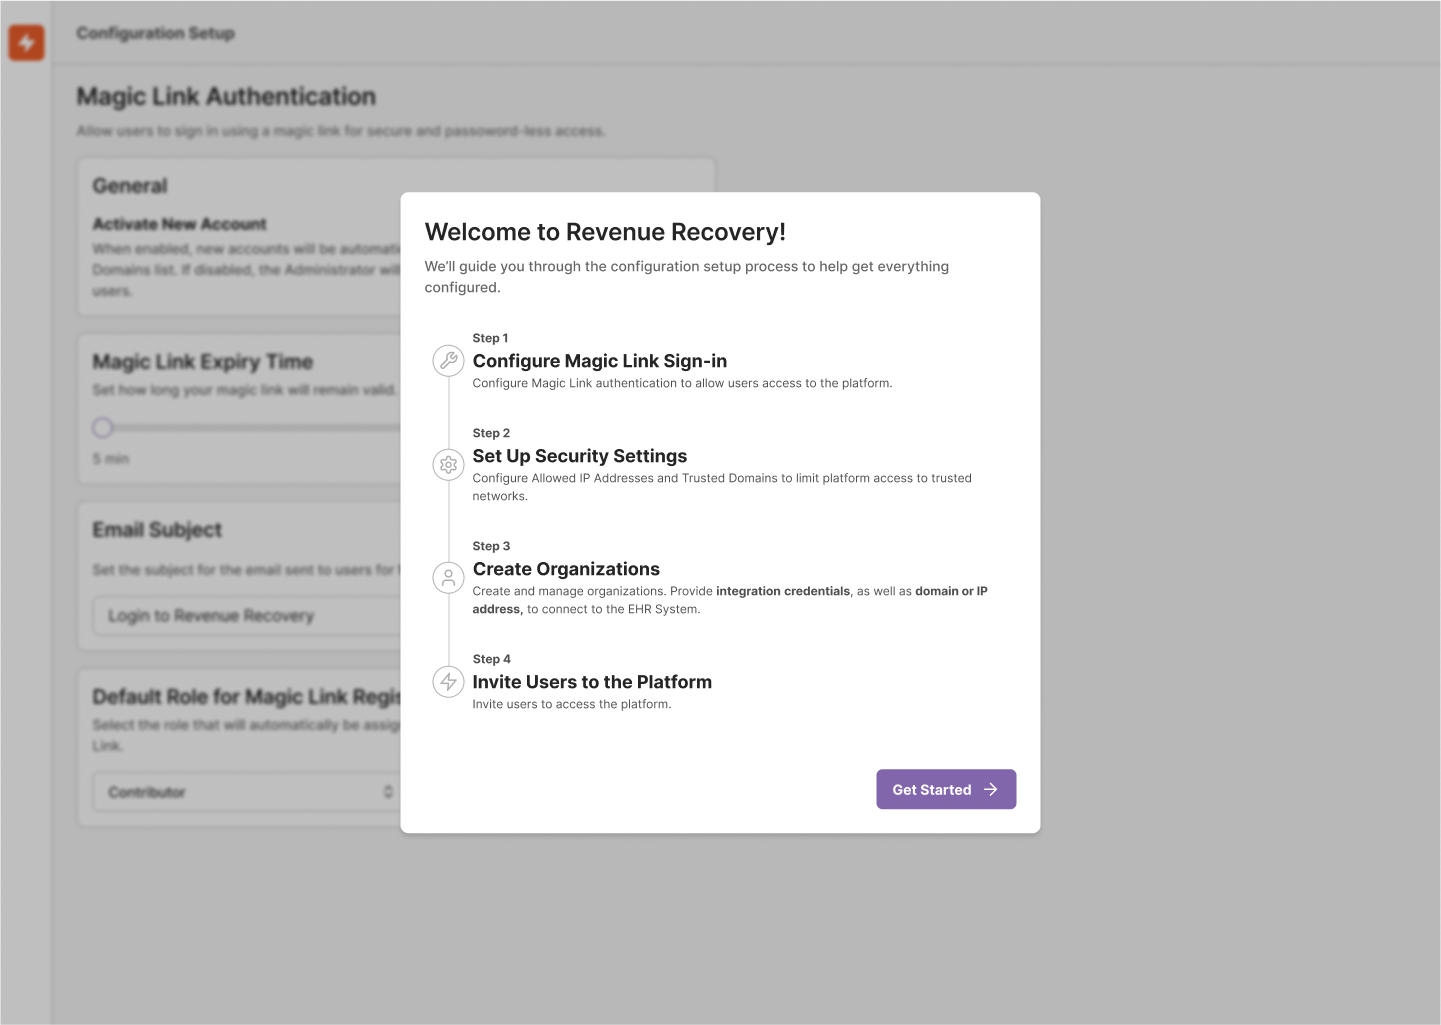
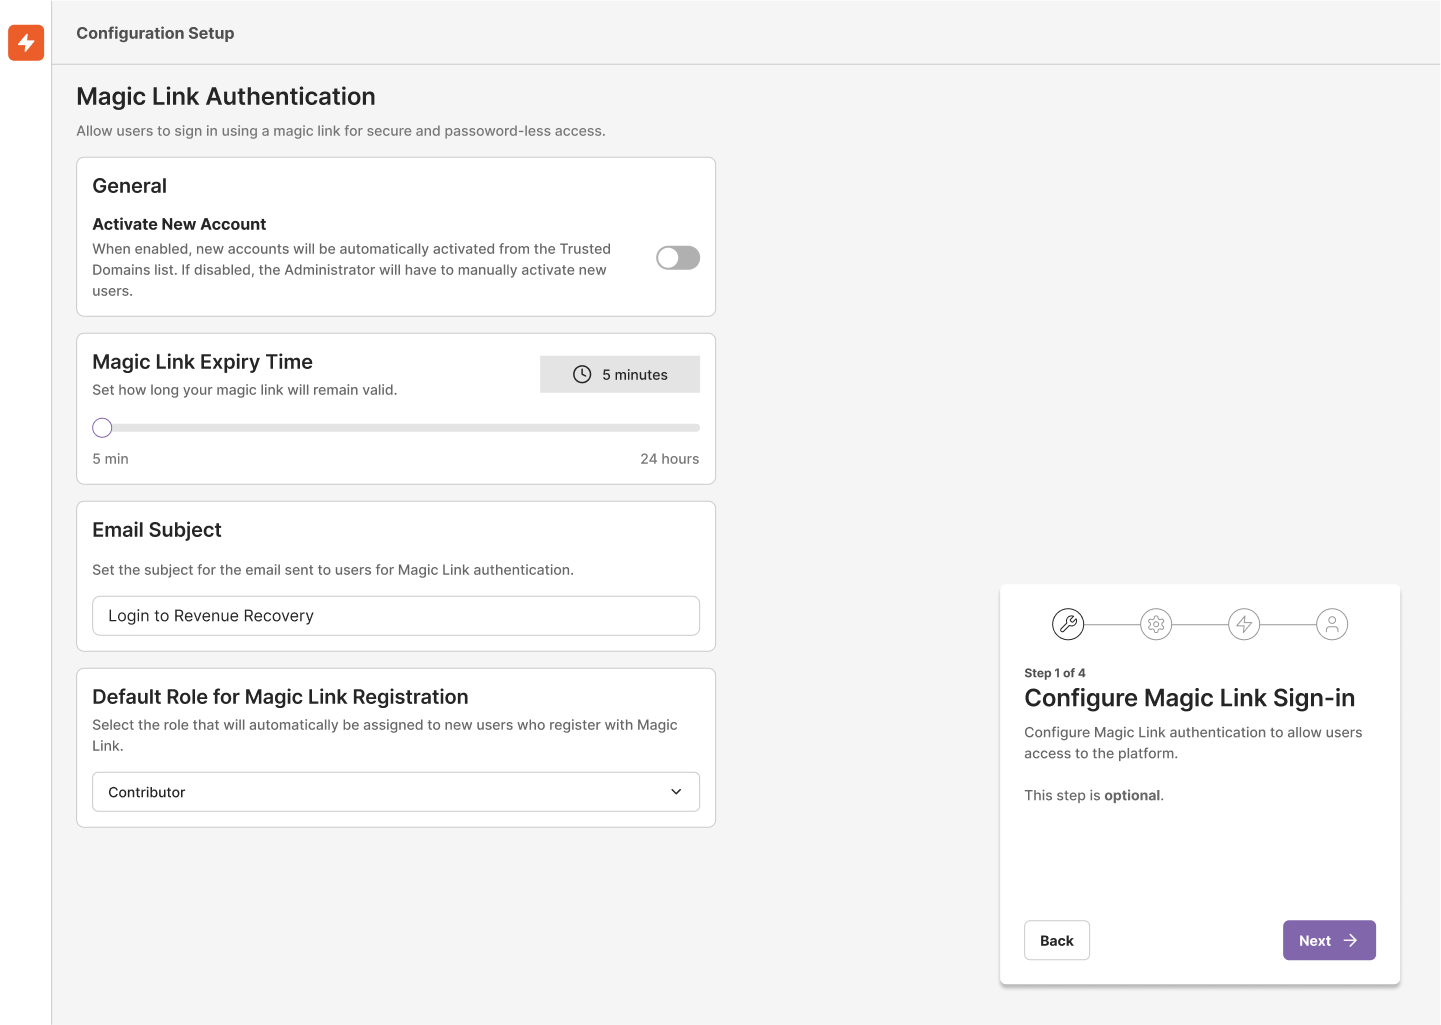
Step 1: Configure Magic Link Sign-in
- Set up secure email-based authentication
- Configure allowed email domains
- Set magic link expiration settings
- Define session timeout policies
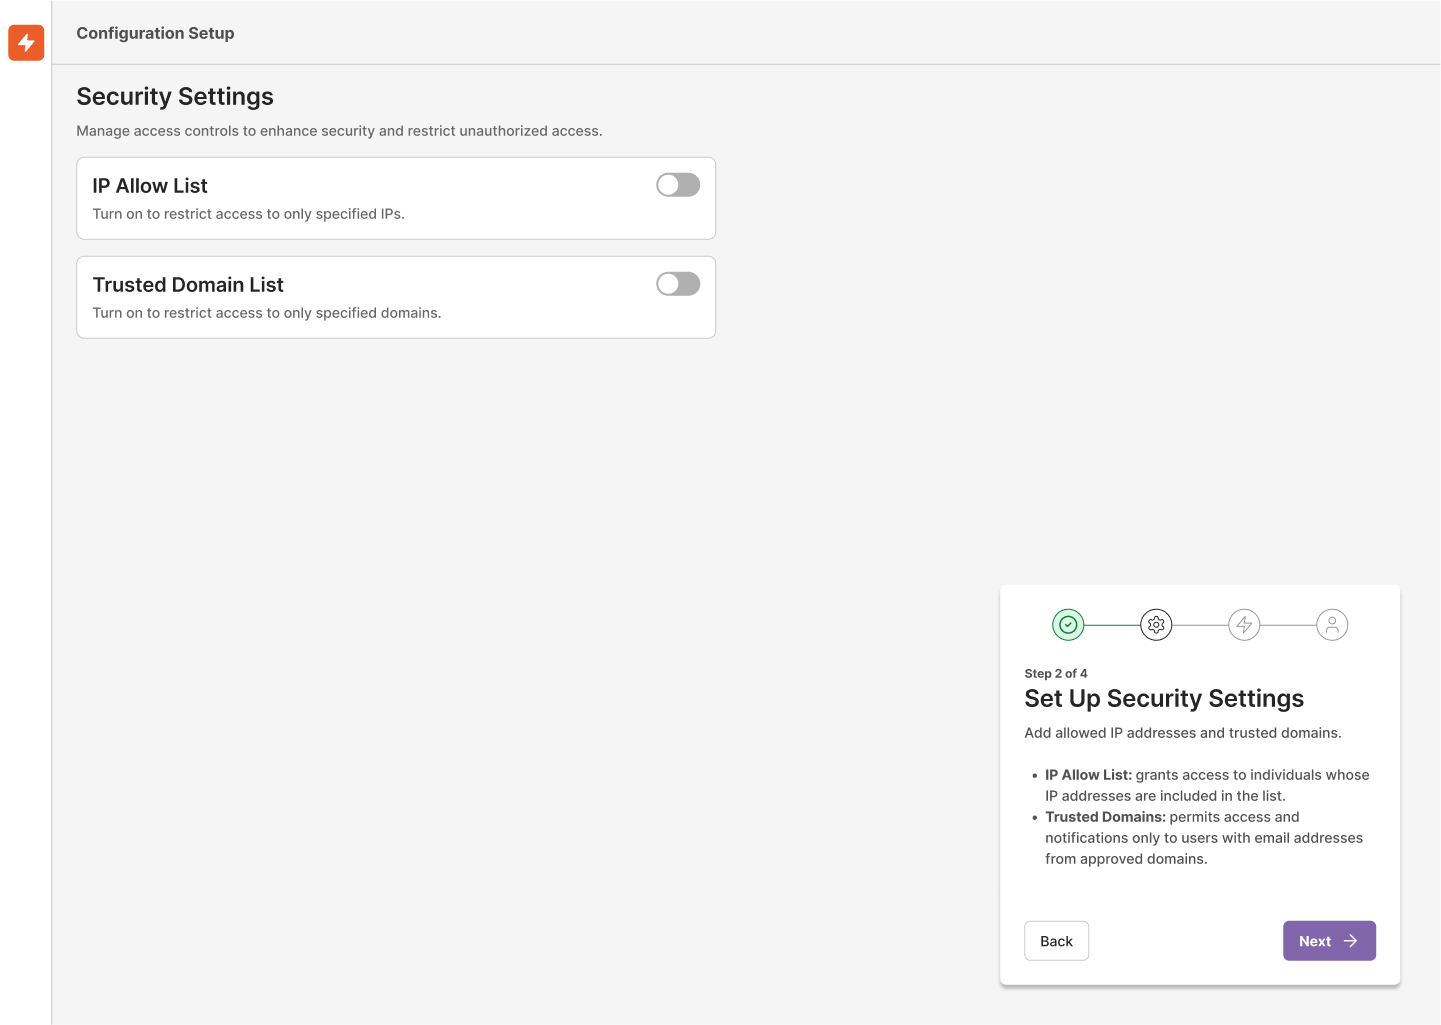
Step 2: Security Settings
- Configure IP allow-lists and restrictions
- Set up Multi-Factor Authentication (MFA) requirements
- Define password policies (if using password authentication)
- Configure session management settings
Step 3: Create Organization
- Enter your organization's legal name
- Set up primary contact information
- Configure timezone and regional settings
- Define organizational structure and hierarchy

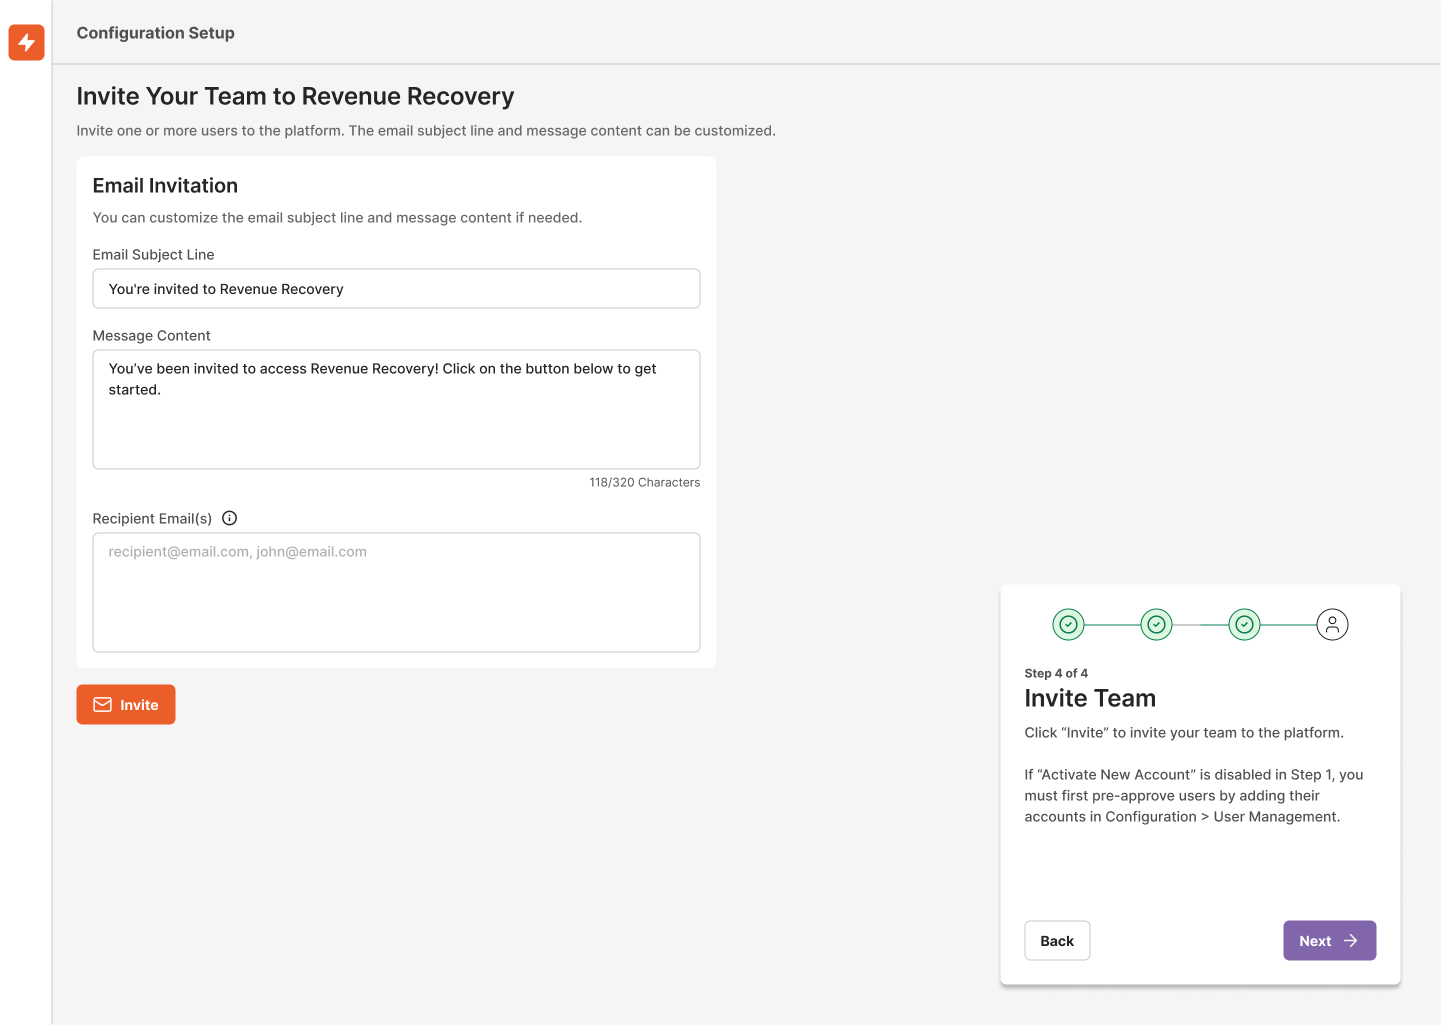
Step 4: Invite Users
- Add team members by email
- Assign appropriate roles and permissions
- Set up user groups and access levels
- Configure approval workflows
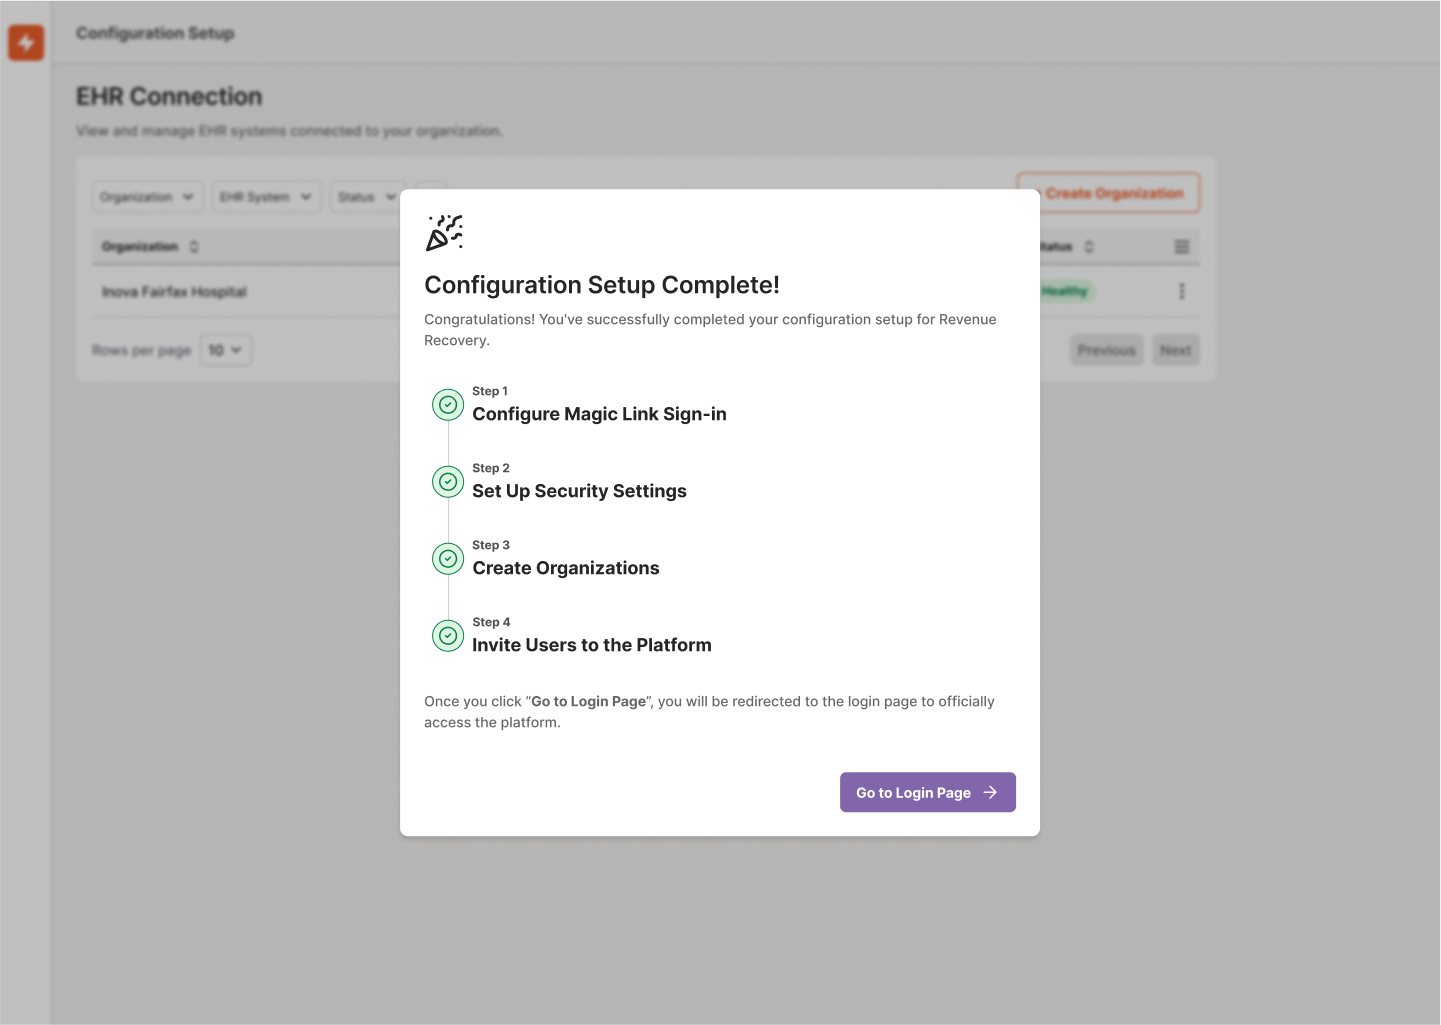
Confirmation
- Review all configuration settings
- Verify security protocols
- Confirm user access and permissions
- Complete final system checks
On-Premise Deployment Setup
Follow these steps to configure your On-Premise environment:
For On-Premise Deployment
Start the Onboarding Process
Click the "Get Started" link in the email to access the on-premise onboarding portal
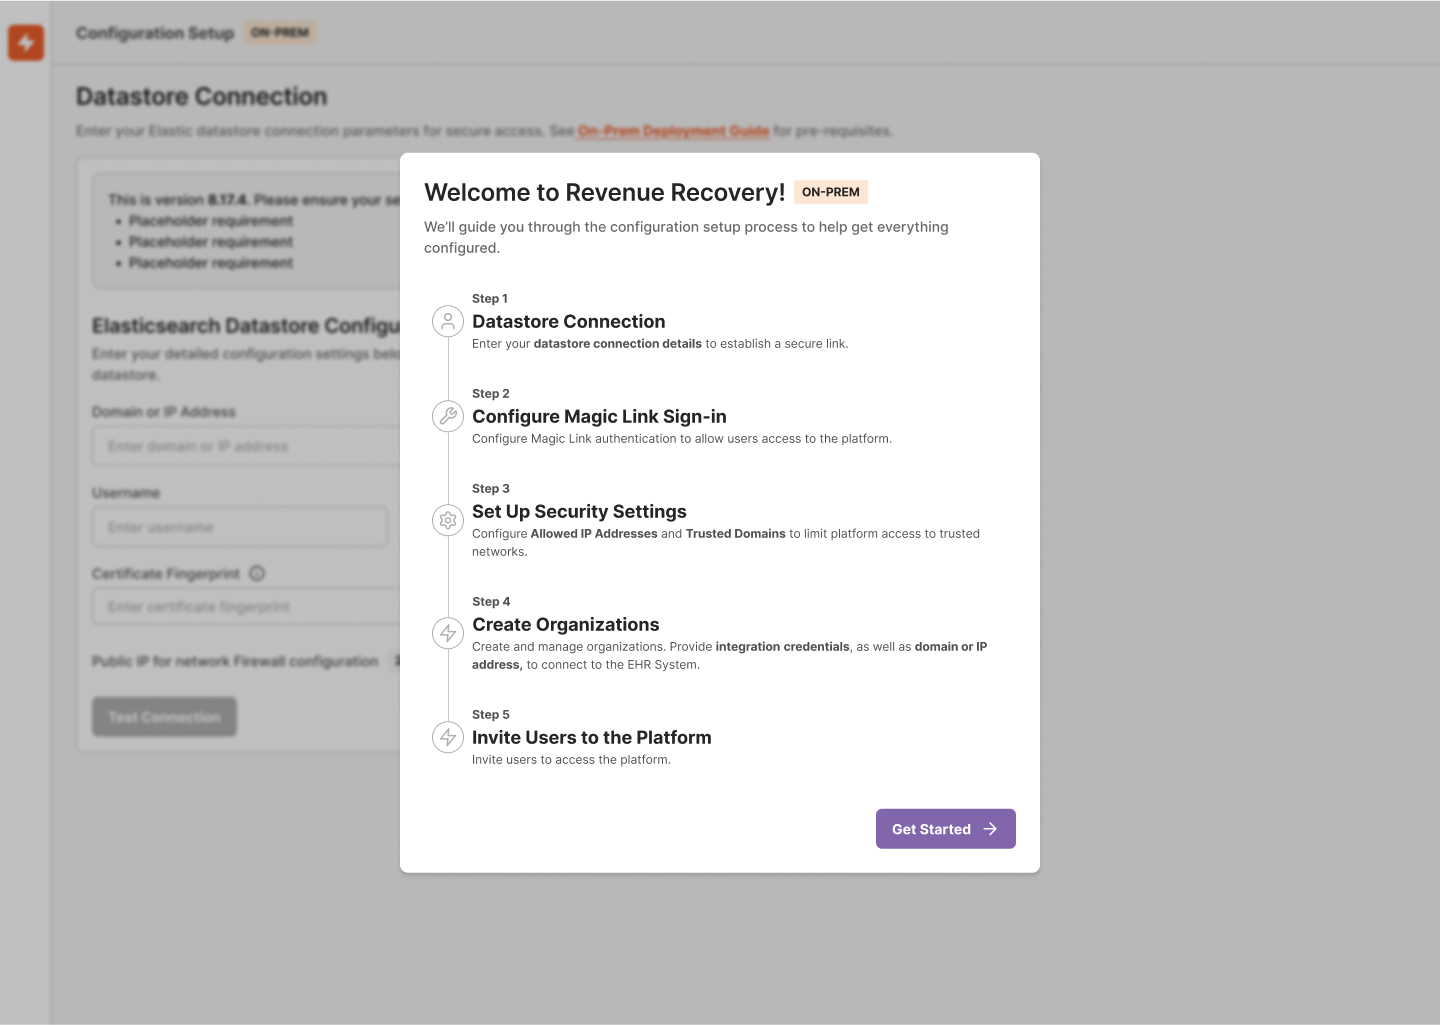
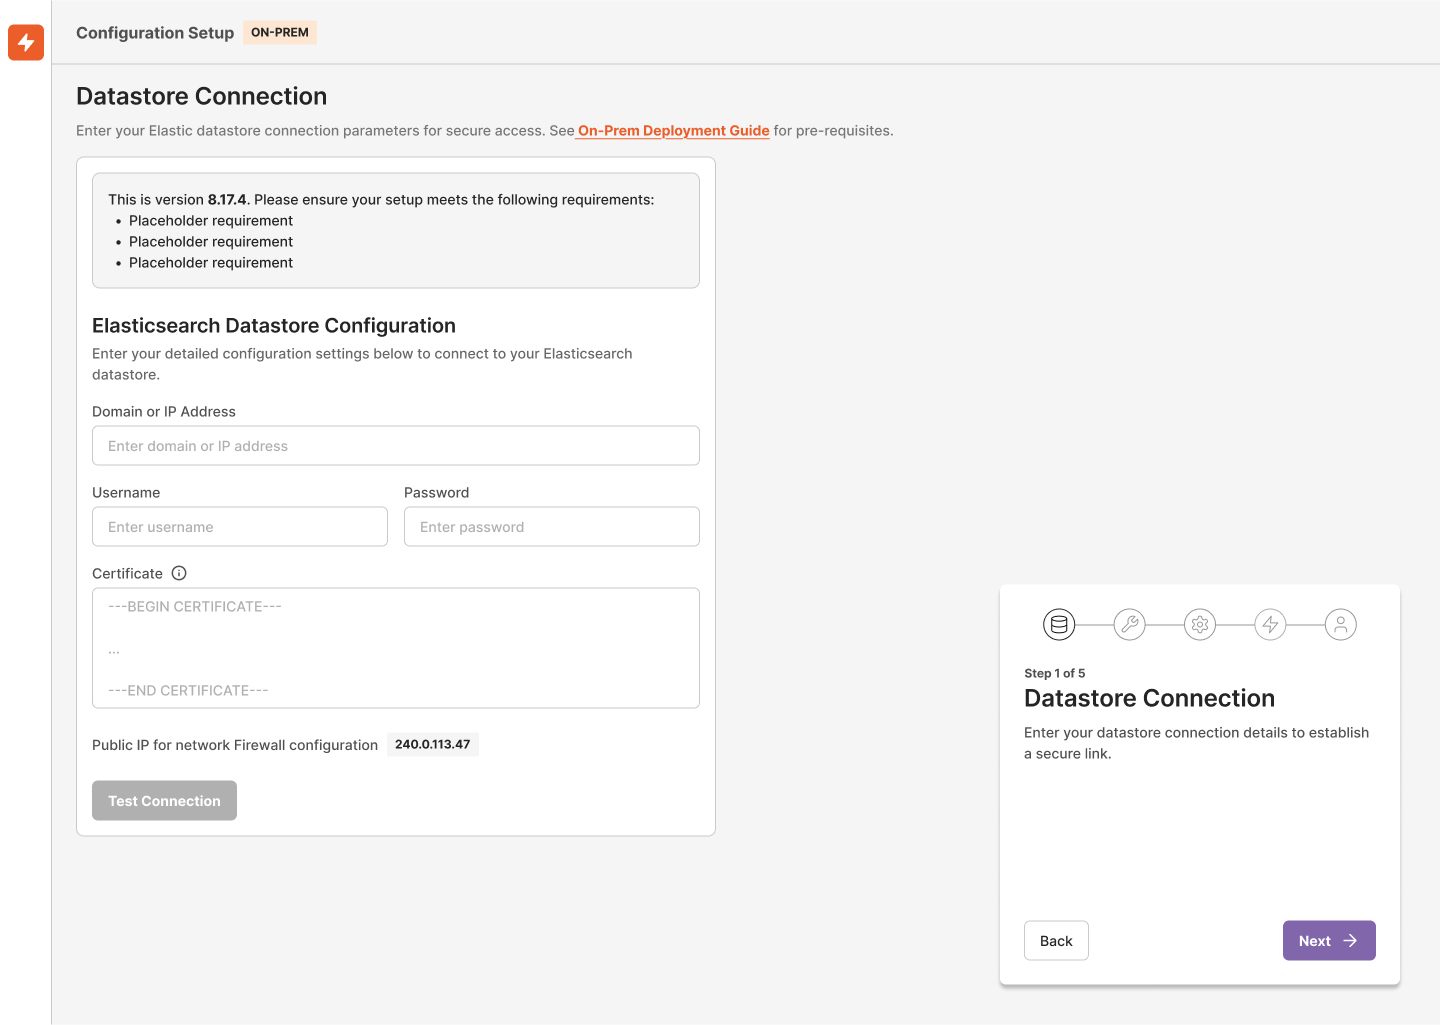
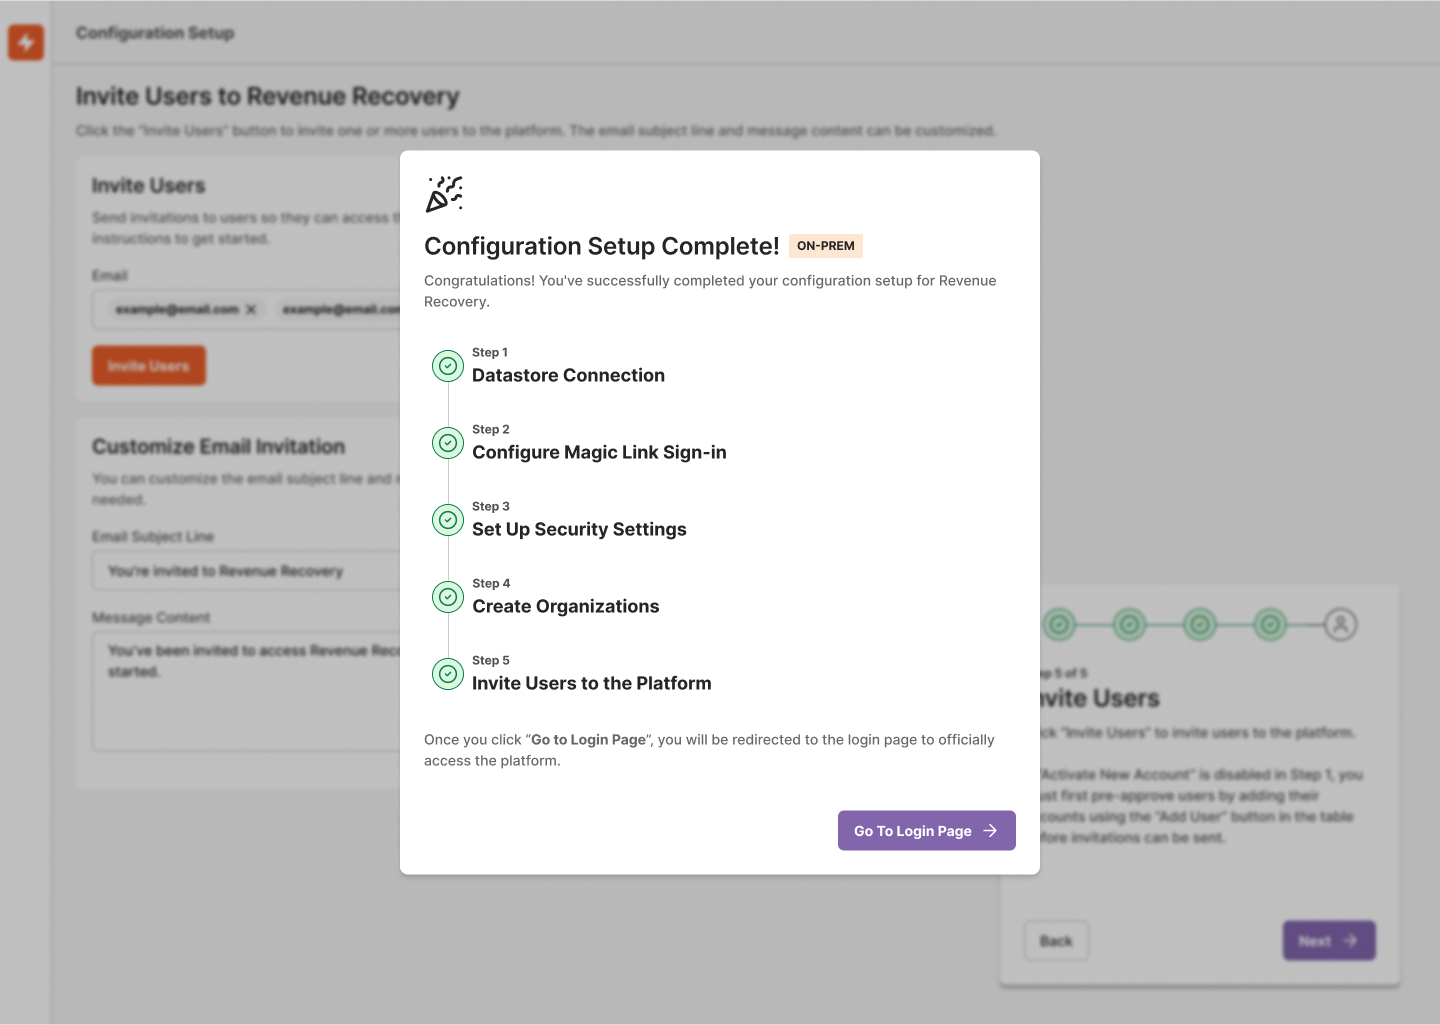
1. Step 1: Connect Your Datastore
- Verify server requirements are met
- Configure network settings
- Set up required databases
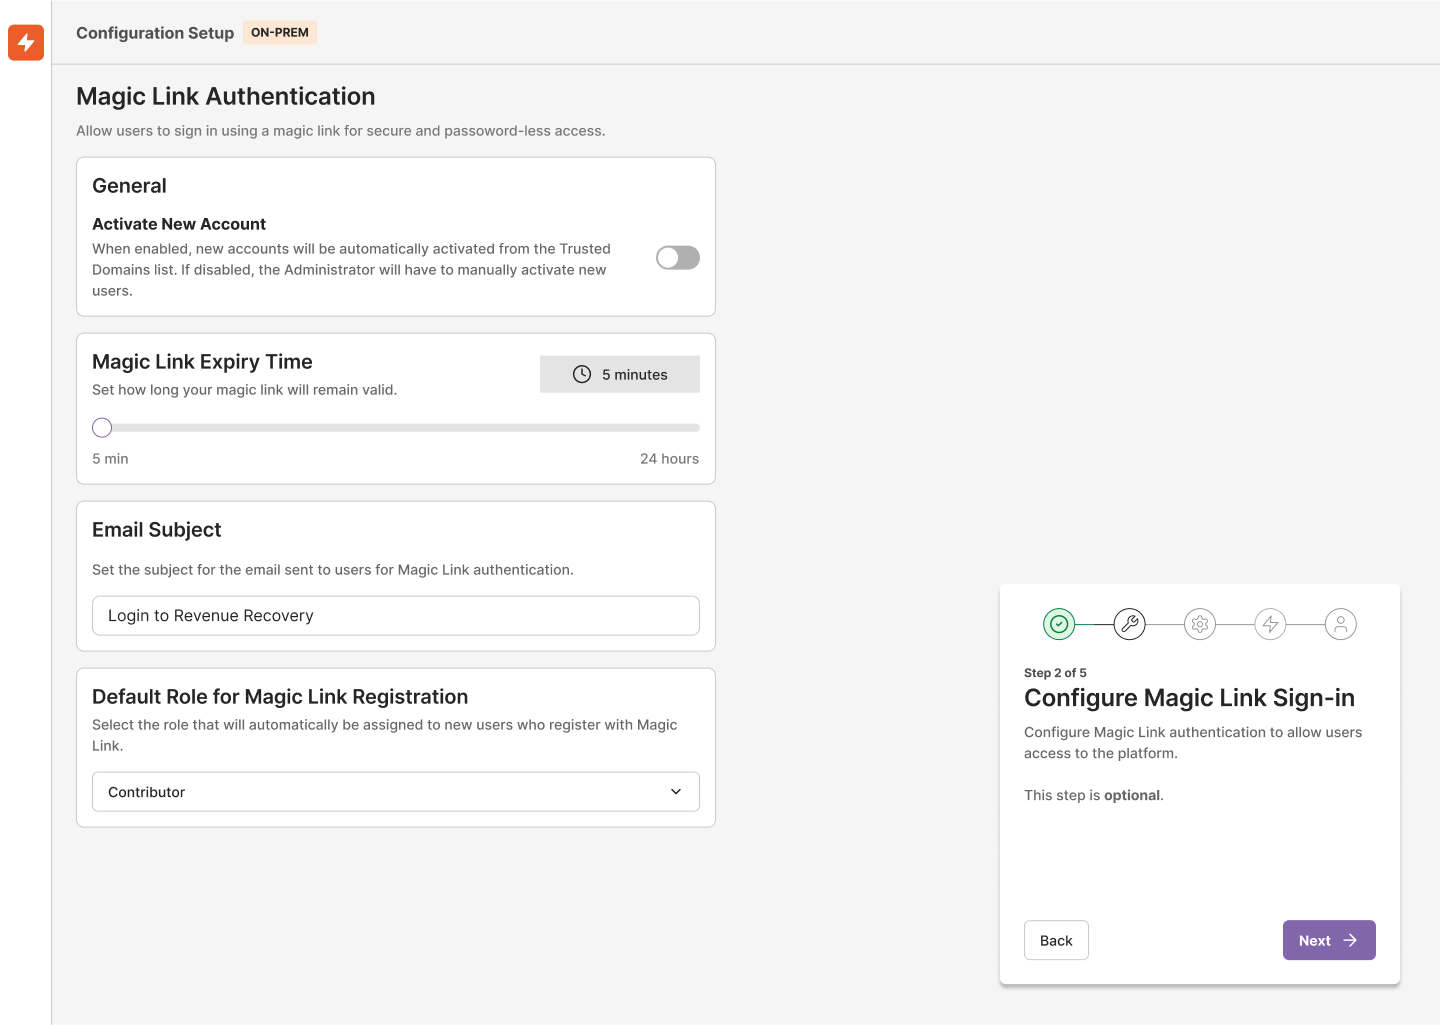
Step 2: Configure Magic Link Sign-in
- Set up secure email-based authentication
- Configure allowed email domains
- Set magic link expiration settings
- Define session timeout policies
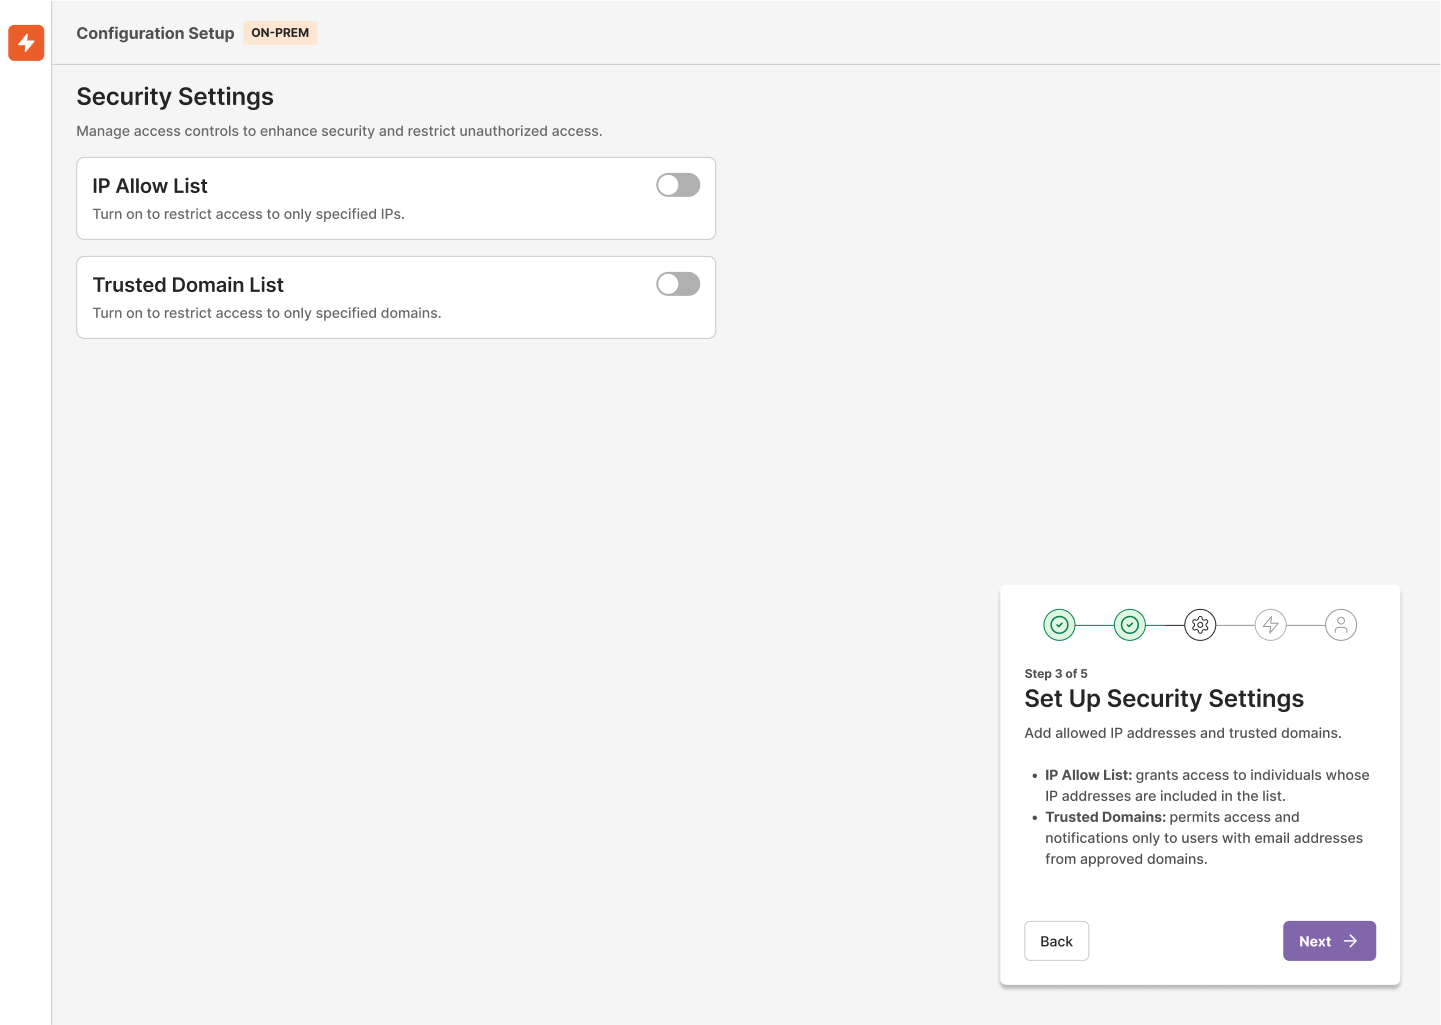
Step 3: Security Settings
- Configure IP allow-lists and restrictions
- Set up Multi-Factor Authentication (MFA) requirements
- Define password policies (if using password authentication)
- Configure session management settings
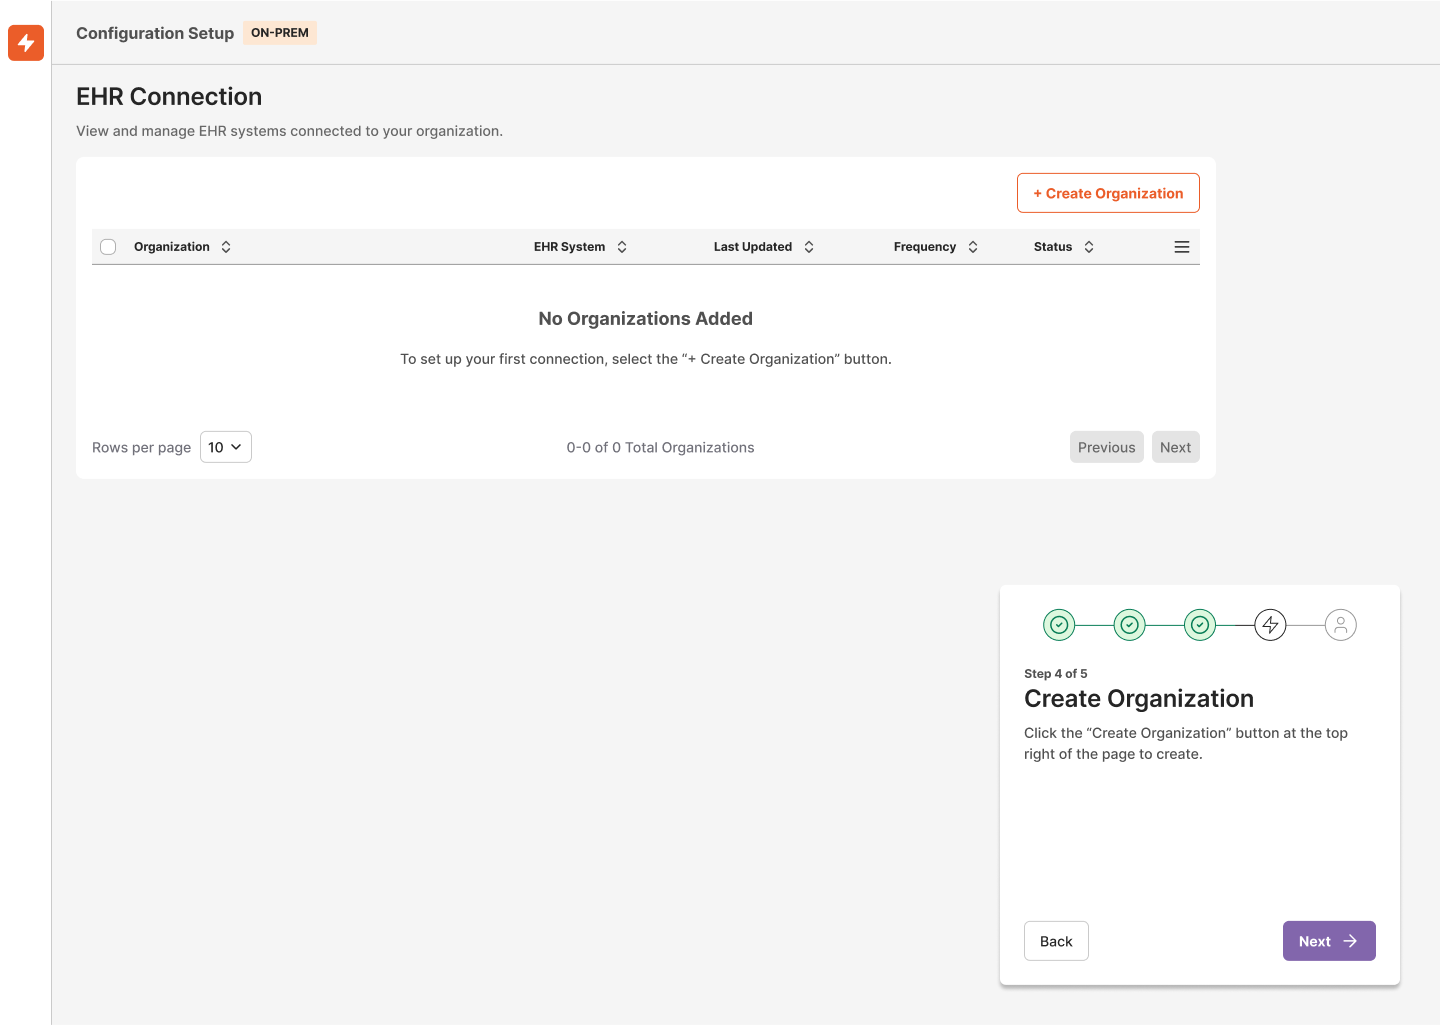
Step 4: Create Organization
- Enter your organization's legal name
- Set up primary contact information
- Configure timezone and regional settings
- Define organizational structure and hierarchy
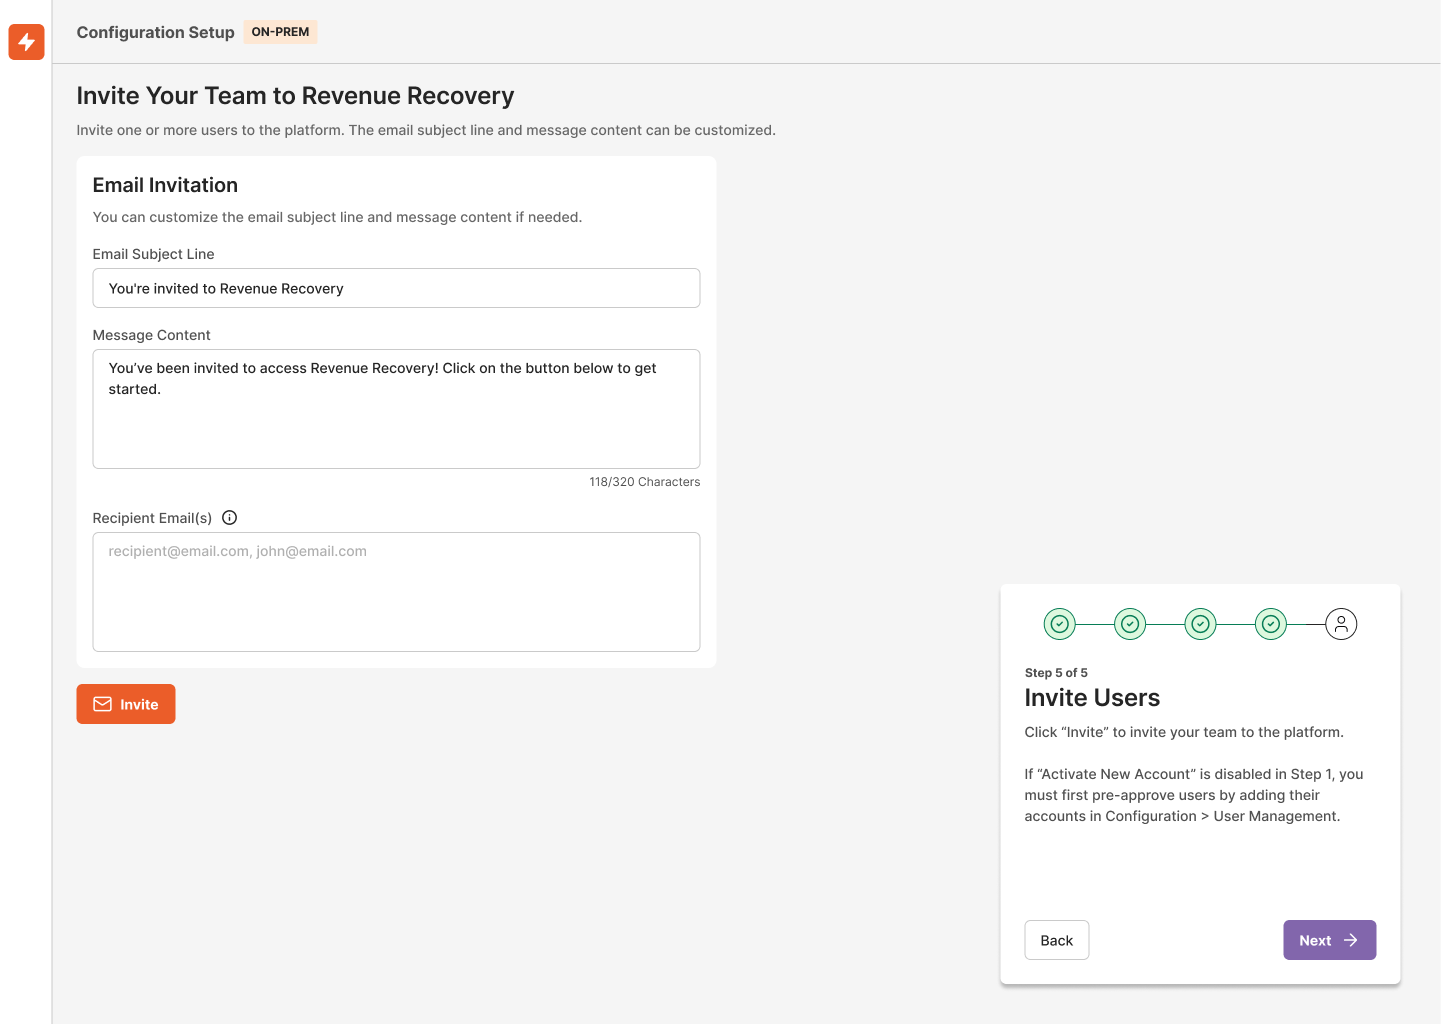
Step 5: Invite Users
- Add team members by email
- Assign appropriate roles and permissions
- Set up user groups and access levels
- Configure approval workflows
Confirmation
- Review all configuration settings
- Verify security protocols
- Confirm user access and permissions
- Complete final system checks
Your next critical step is establishing a secure connection between the Revenue Recovery platform and your Electronic Health Record (EHR) system. This connection enables automated data collection and analysis of denied claims. The platform uses a Relay Service architecture to securely connect to your internal systems without exposing them directly to the internet.
Learn how to establish this connection in Connecting your EHR, which provides an overview of the connection architecture and process. For detailed step-by-step instructions, see Linking to Internal Systems.
Create and Configure Organizations
Organizations are the primary way to structure and manage your claims data within Revenue Recovery. Each organization typically represents a distinct healthcare facility, department, or billing entity. Setting up organizations correctly ensures that claims data is properly segmented and accessible to the right users.
To learn more about how organizations work and how to create them, see Organizations. This guide explains the organization concept and how to navigate between different organizations in the platform.
Configure Platform Settings
As an administrator, you may want to review and adjust platform-wide settings to match your organization's requirements. These settings control authentication methods, security policies, user permissions, and other system-level configurations.
For detailed information on available settings and how to configure them, see Configuring Authentication and Security Settings.
Set Up Additional Users and Groups
If you need to add more team members or organize users into groups with specific permissions, you can manage these settings in the administration section. User groups allow you to assign roles and permissions to multiple users at once, making it easier to manage access control.
For detailed instructions, see User and Group Management to learn how to add new users, create and manage user groups, and assign appropriate roles and permissions.
Familiarize Yourself with the Dashboard
The Revenue Recovery Dashboard serves as your central command center for monitoring claim denial patterns and identifying recovery opportunities. Take time to explore the dashboard interface and understand the available insights and widgets.
Learn more in Navigation UI Basics, which explains general navigation and UI basics. For detailed information about the dashboard specifically, see Dashboard and Insights, which explains how to navigate the dashboard interface and interpret the key metrics displayed in various widgets.
Next Steps
After completing the initial onboarding:
- Complete your First-Time Login using the credentials you configured during onboarding
- Explore the Dashboard and Insights to understand your data
- Learn about Working with Denied Claims
Need Help?
If you encounter any issues during the onboarding process:
- Check our Troubleshooting Guide
- Contact support through the help widget in the bottom right corner
- Email [email protected] for urgent assistance
Remember to save your progress at each step of the onboarding process. The system will guide you through any incomplete sections when you return.
Updated 9 months ago