
Set Up Your Own Microsoft Entra App
Register a Microsoft Entra ID application in your own tenant and connect it to Revenue Recovery
If your organization wants Revenue Recovery to authenticate users against your own Microsoft Entra tenant, you must register a Microsoft Entra application in that tenant and provide its credentials to Revenue Recovery. This keeps sign-in under your organization's control and allows Revenue Recovery to read Microsoft group memberships for role assignment.
This guide walks through the complete setup flow shown in the screenshots, from app registration in Microsoft Entra to validating the connection inside Revenue Recovery.
What This Setup Does
When Microsoft Entra ID is enabled in Revenue Recovery:
- Users sign in with their Microsoft account from your tenant
- Revenue Recovery uses your app registration to redirect users to Microsoft securely
- Microsoft returns identity information to Revenue Recovery after sign-in
- Revenue Recovery can read the user's group memberships to apply group-based role mapping
Important: Revenue Recovery needs three values from your Entra app registration: Directory (tenant) ID, Application (client) ID, and a client secret value.
Before You Start
Make sure you have:
- A Microsoft Entra administrator account that can register applications and grant admin consent
- Administrator access in Revenue Recovery
- Your Revenue Recovery base URL, for example
https://your-company.ailevate.com - A decision on how long the client secret should remain valid
You will configure a single-tenant app. This is the correct choice when the app is only for users in your own organization.
Step 1: Open Microsoft Entra and Go to App Registrations
In the Microsoft Entra admin center, open your tenant and go to App registrations.
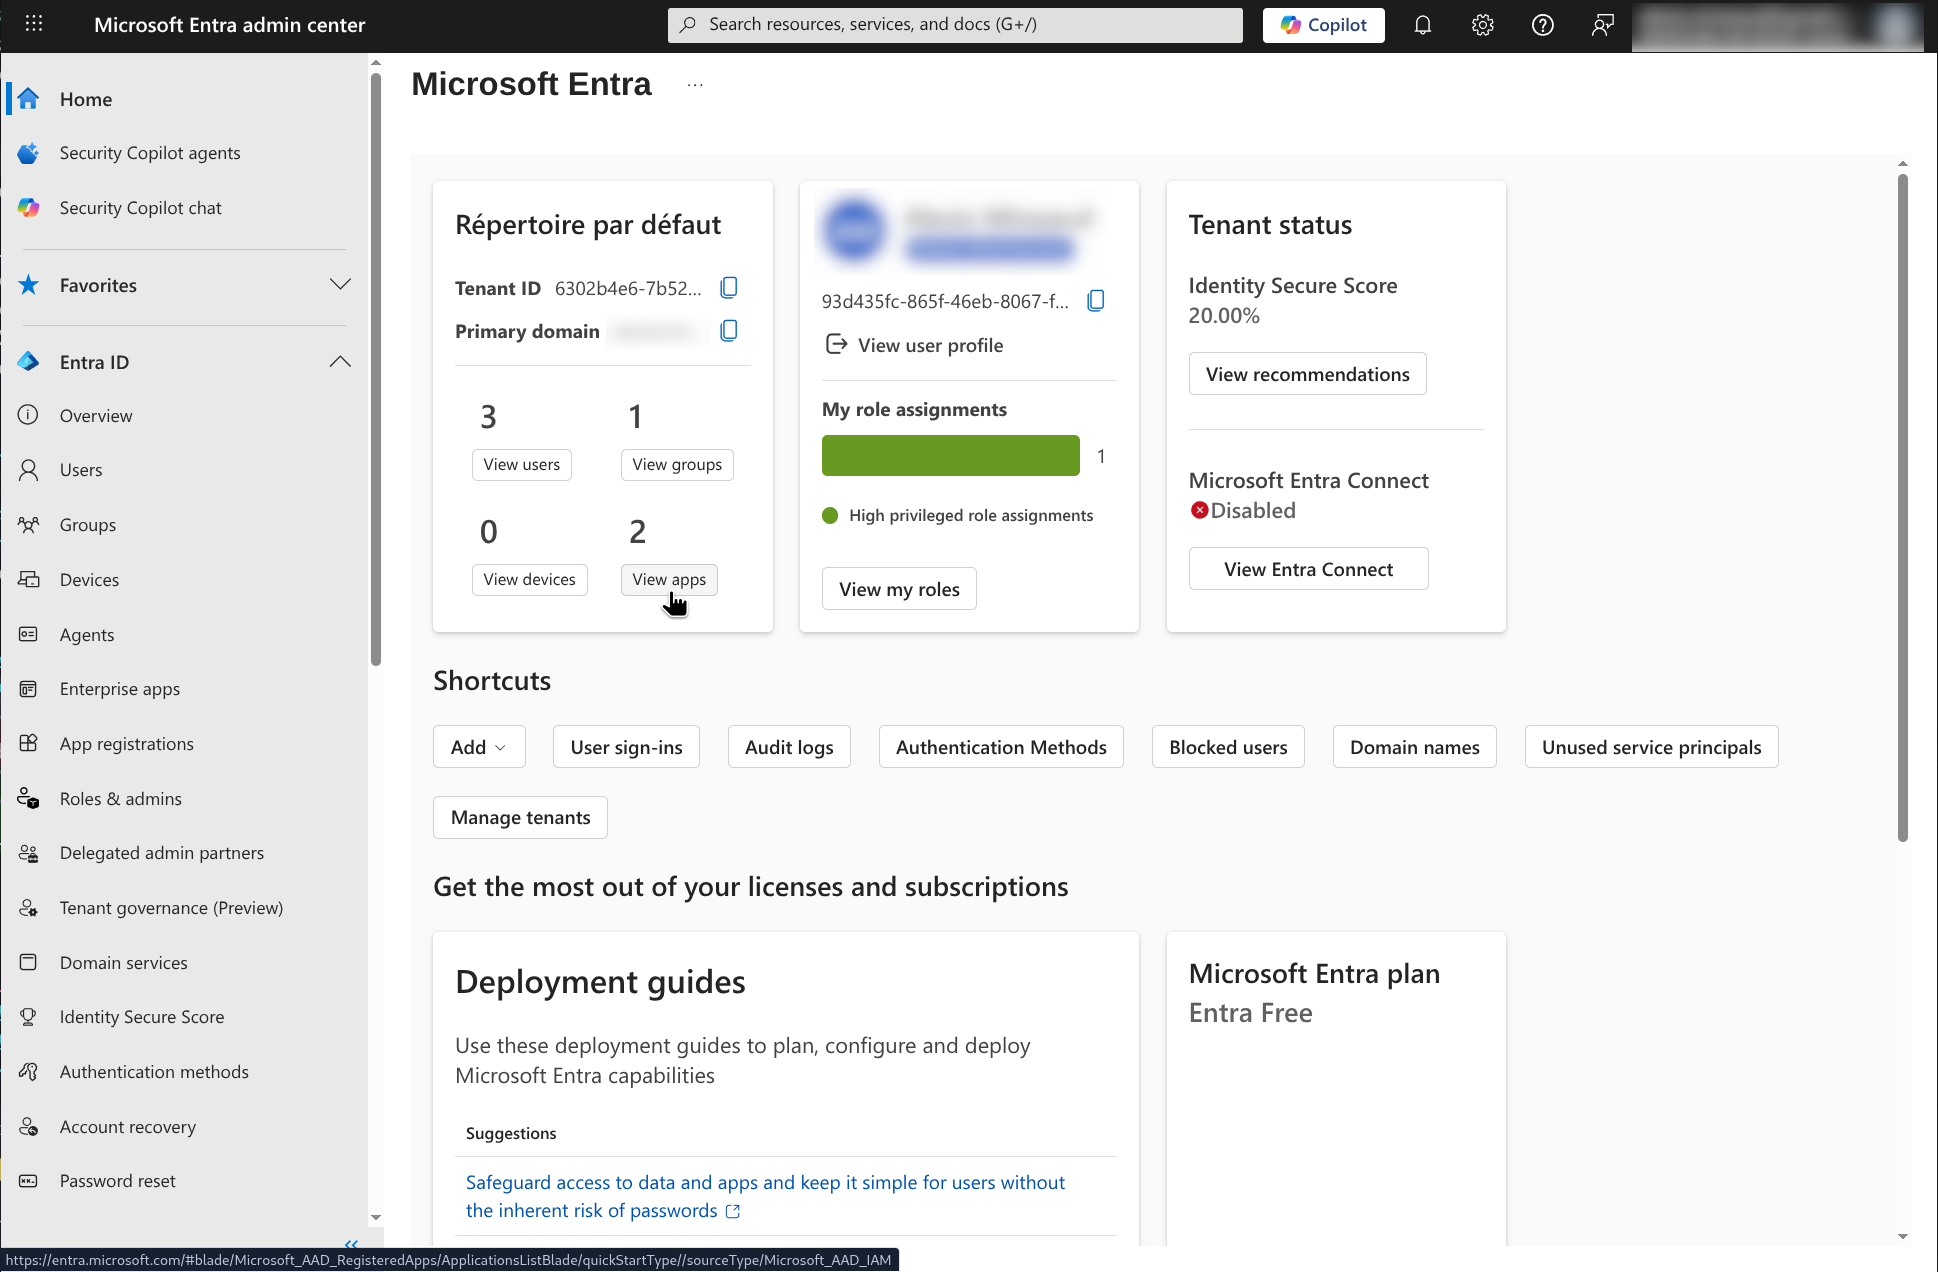 Start from the Microsoft Entra admin center for the tenant that will own the Revenue Recovery app registration
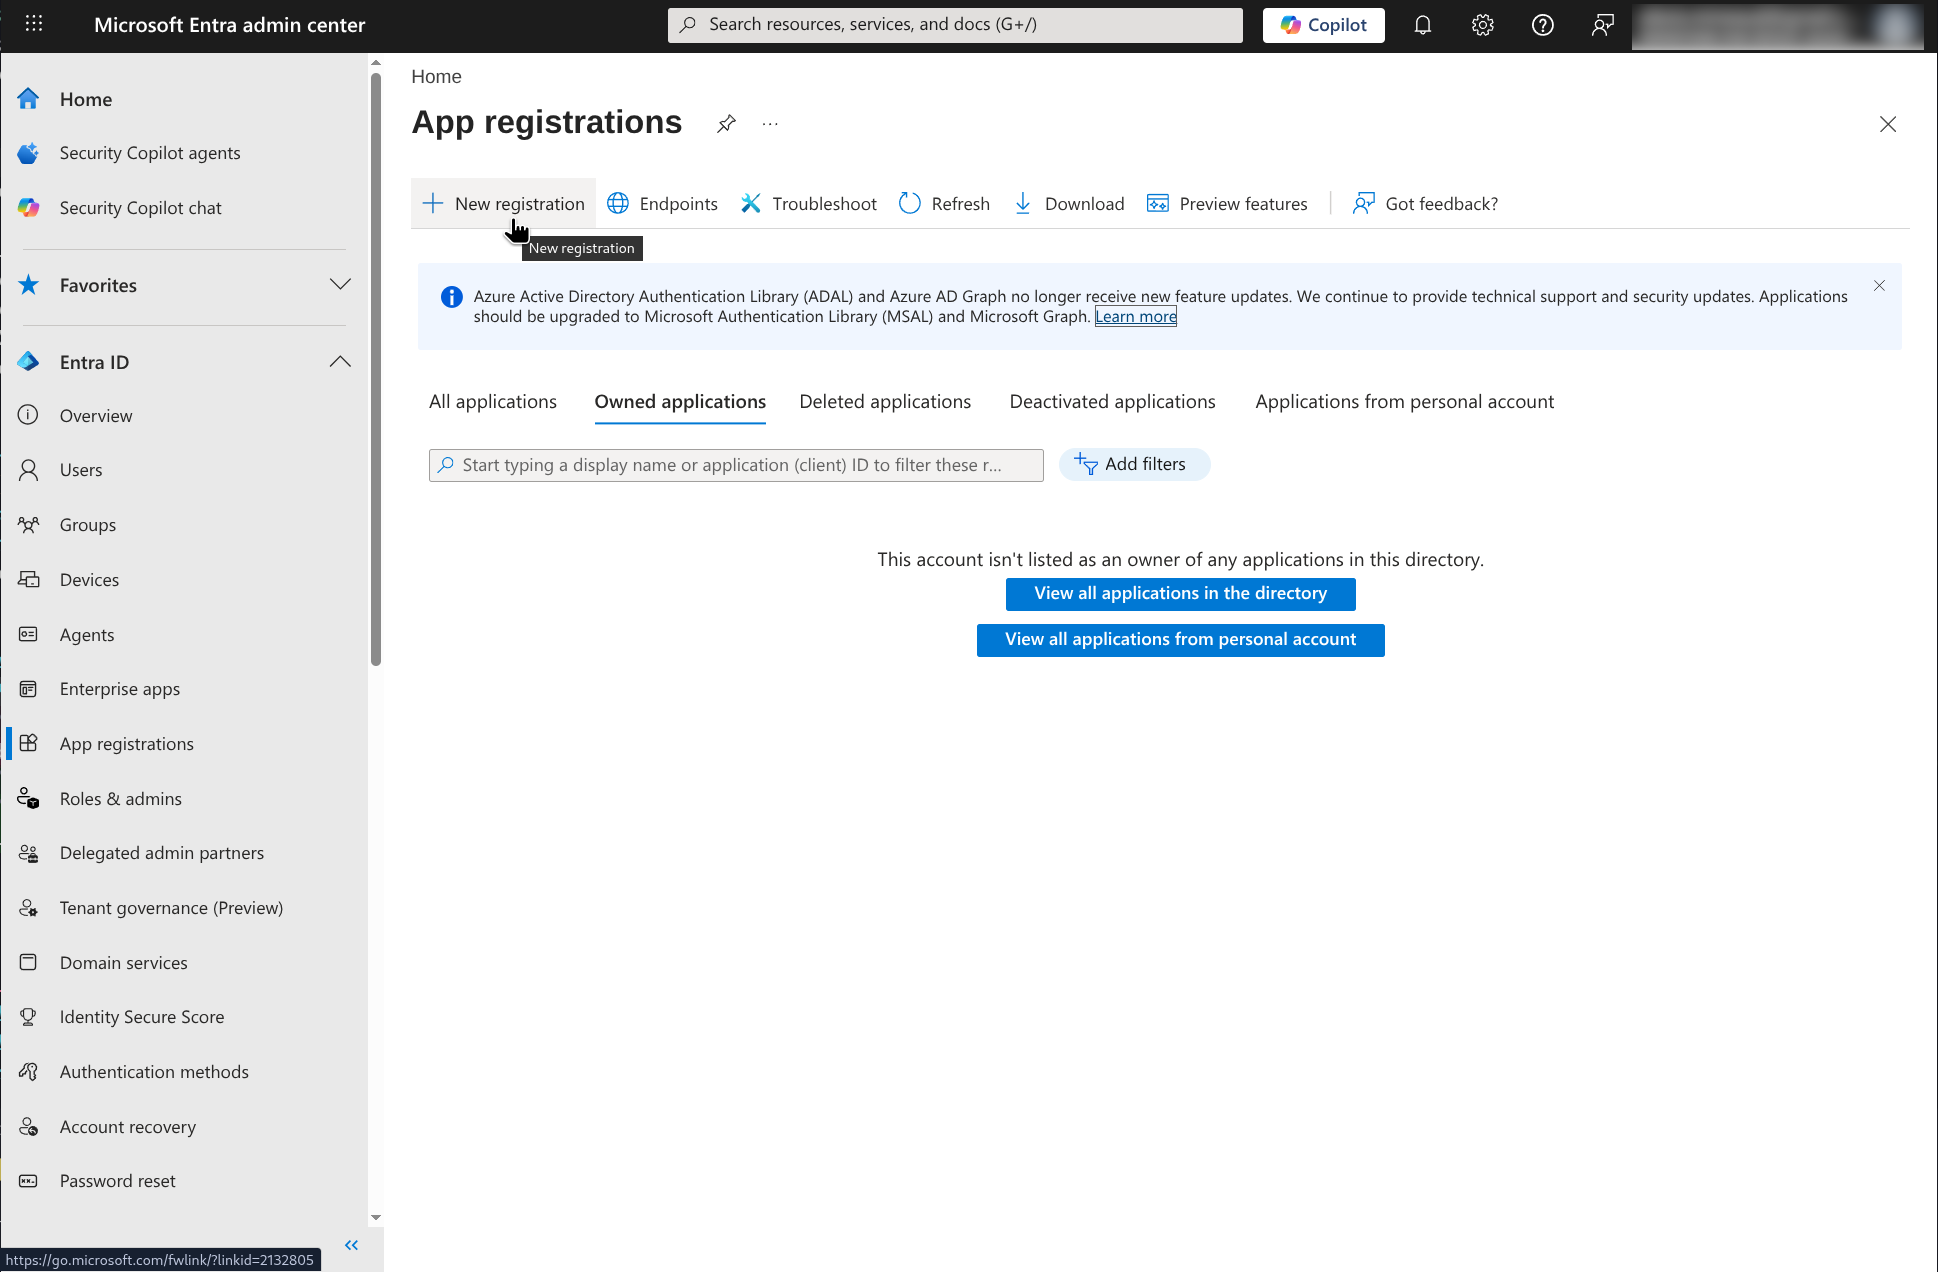 Open App registrations to create a new application in your tenant
If you do not see the option to create an app, your account may not have sufficient permissions. Work with your Microsoft 365 or identity administrator before continuing.
Step 2: Register the Revenue Recovery Application
Click New registration and complete the application form.
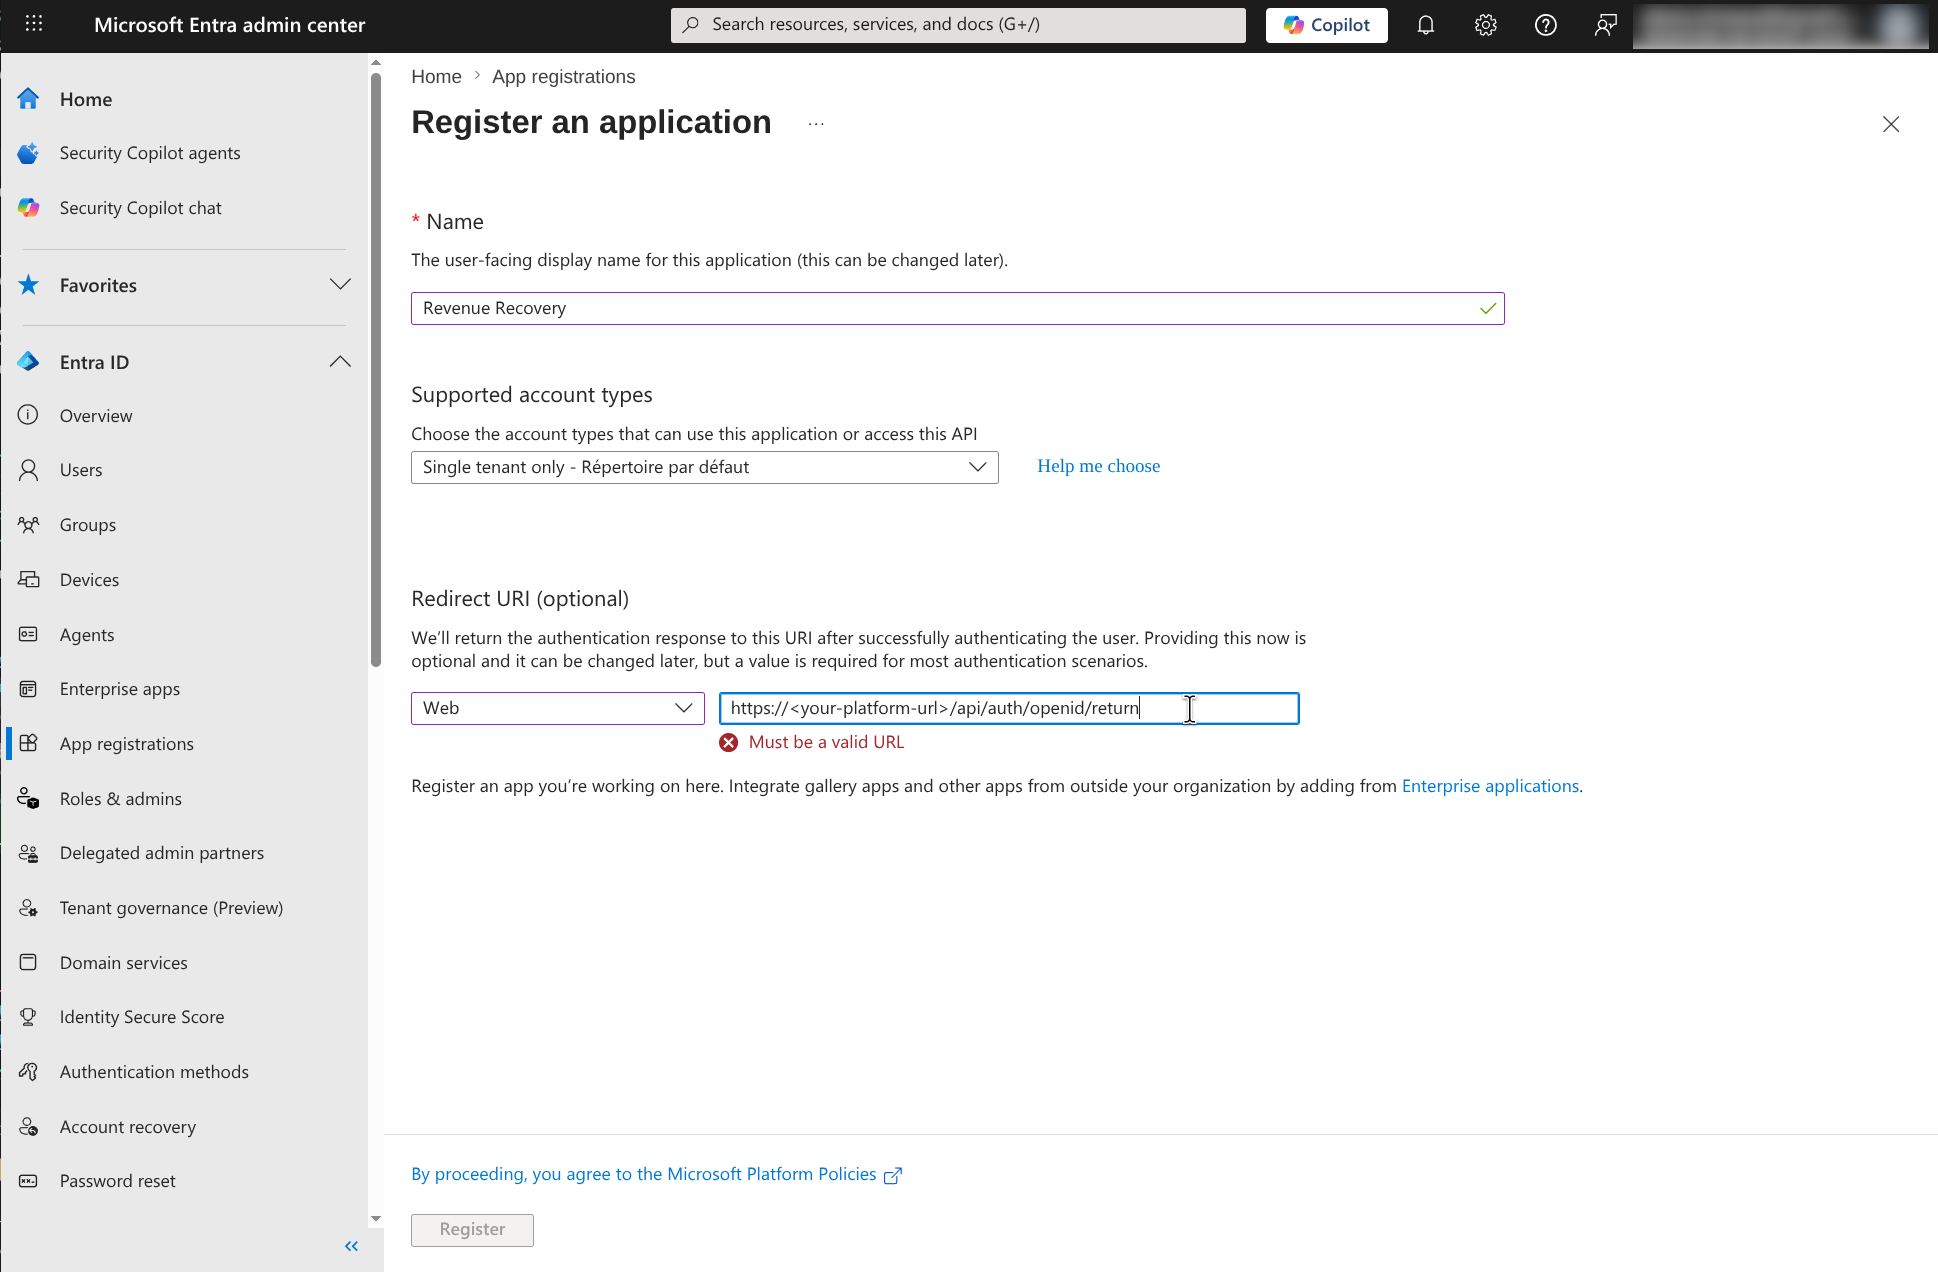 Create a single-tenant web application and enter the Revenue Recovery redirect URI
Use these values:
- Name: A clear name such as
Revenue RecoveryorRevenue Recovery - Production - Supported account types: Single tenant only
- Redirect URI type: Web
- Redirect URI:
https://<your-platform-url>/api/auth/openid/return
Replace <your-platform-url> with your actual Revenue Recovery URL. For example:
https://yourcompany.ailevate.com/api/auth/openid/return
Why this matters: after Microsoft authenticates the user, it sends the browser back to this exact URI. If the URI is wrong, sign-in validation will fail.
Step 3: Add the Required Microsoft Graph Permission
After the app is created, open API permissions. You should already see the default delegated permission User.Read.
 The new app already has Microsoft Graph
 User.Read, which is expected
Click Add a permission and add this Microsoft Graph delegated permission:
- GroupMember.Read.All
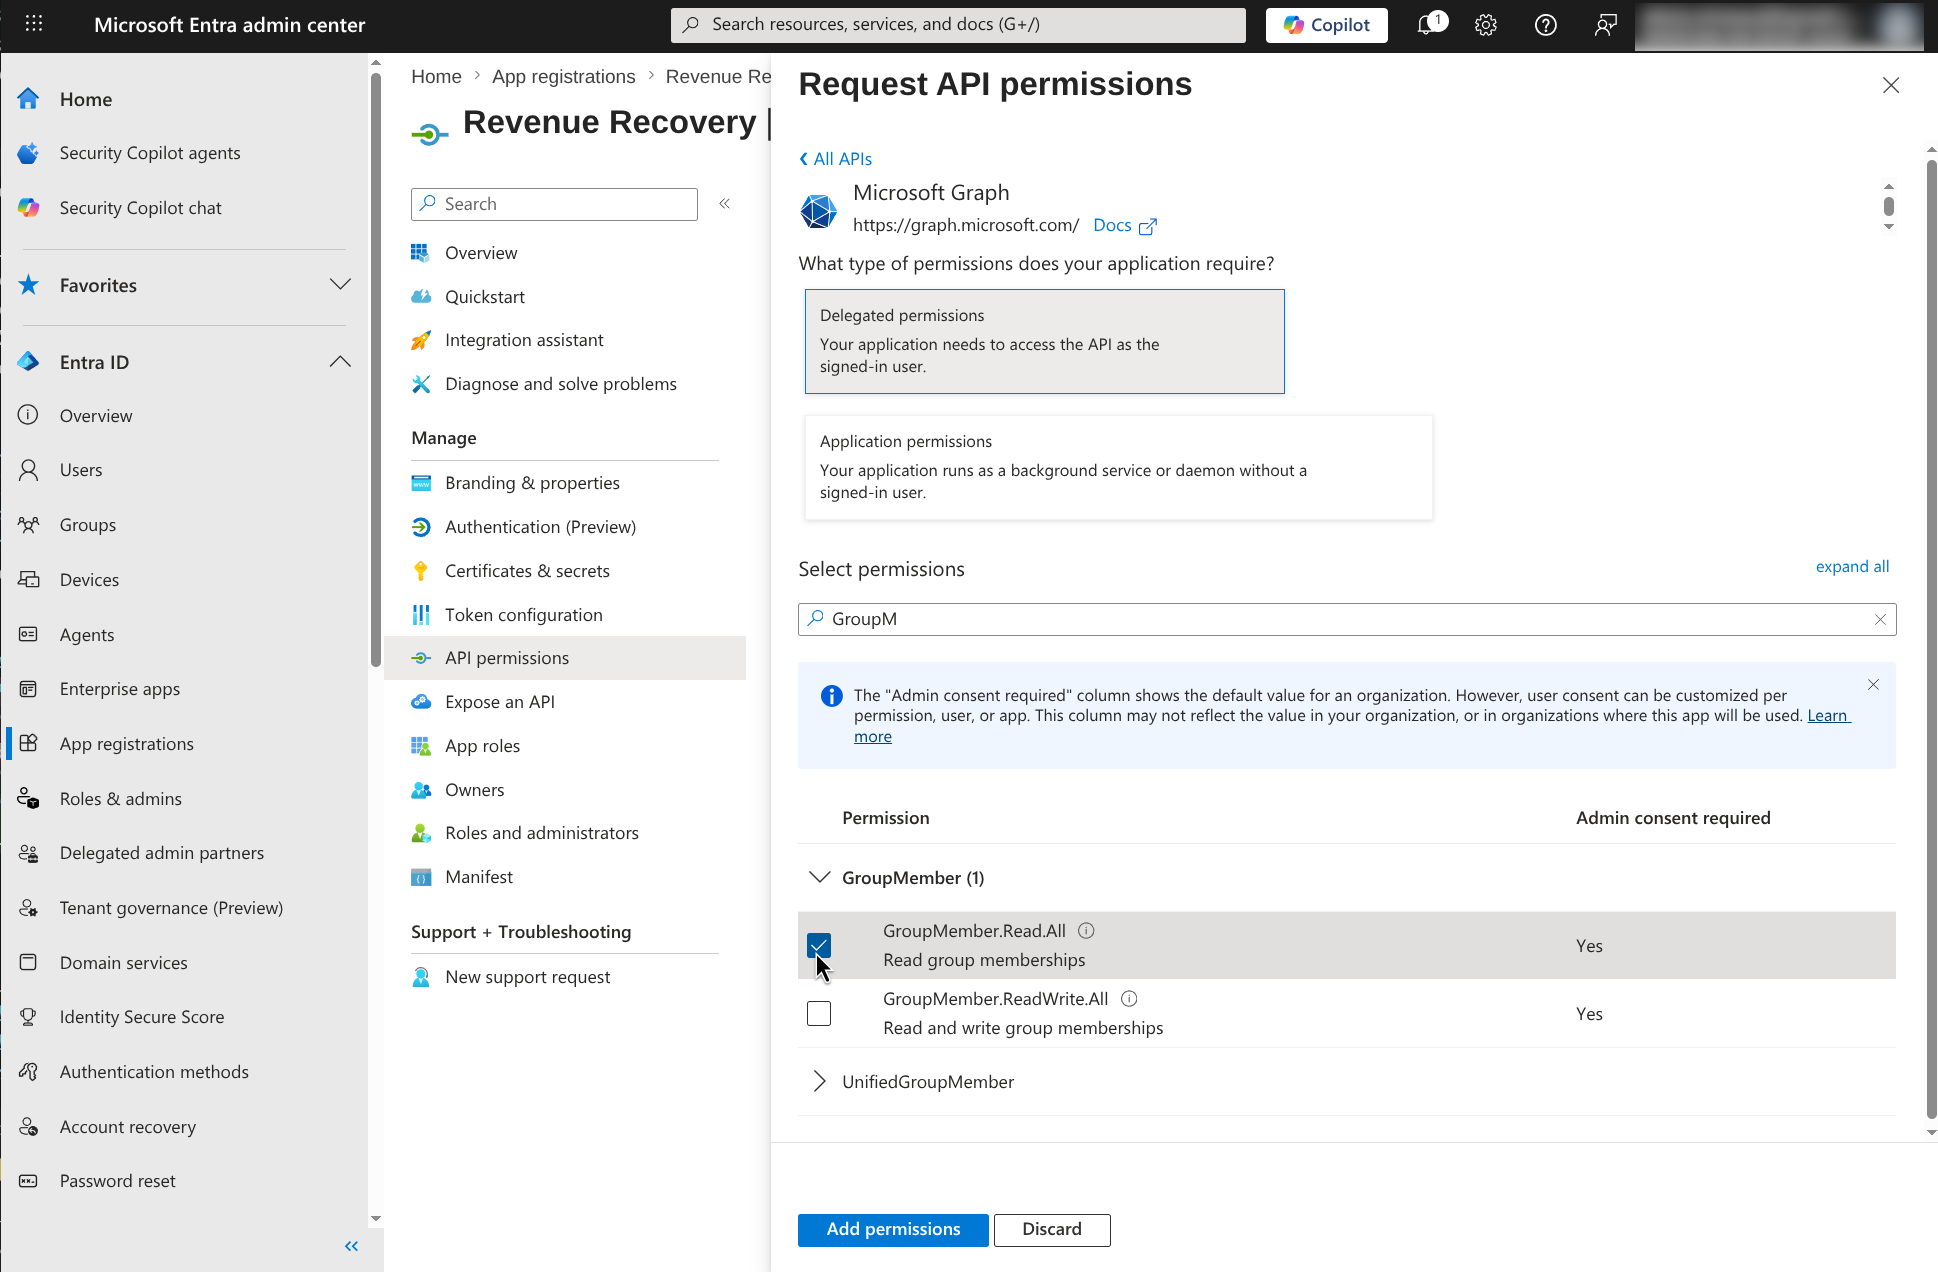 Select the delegated Microsoft Graph permission
 GroupMember.Read.All
Why Revenue Recovery needs these permissions:
- User.Read lets Microsoft identify the signed-in user
- GroupMember.Read.All lets Revenue Recovery read group memberships so you can use Entra groups for role mapping
Note:
GroupMember.Read.Allrequires administrator consent in most tenants.
Step 4: Grant Admin Consent
Back on the API permissions page, click Grant admin consent for <your tenant> and confirm.
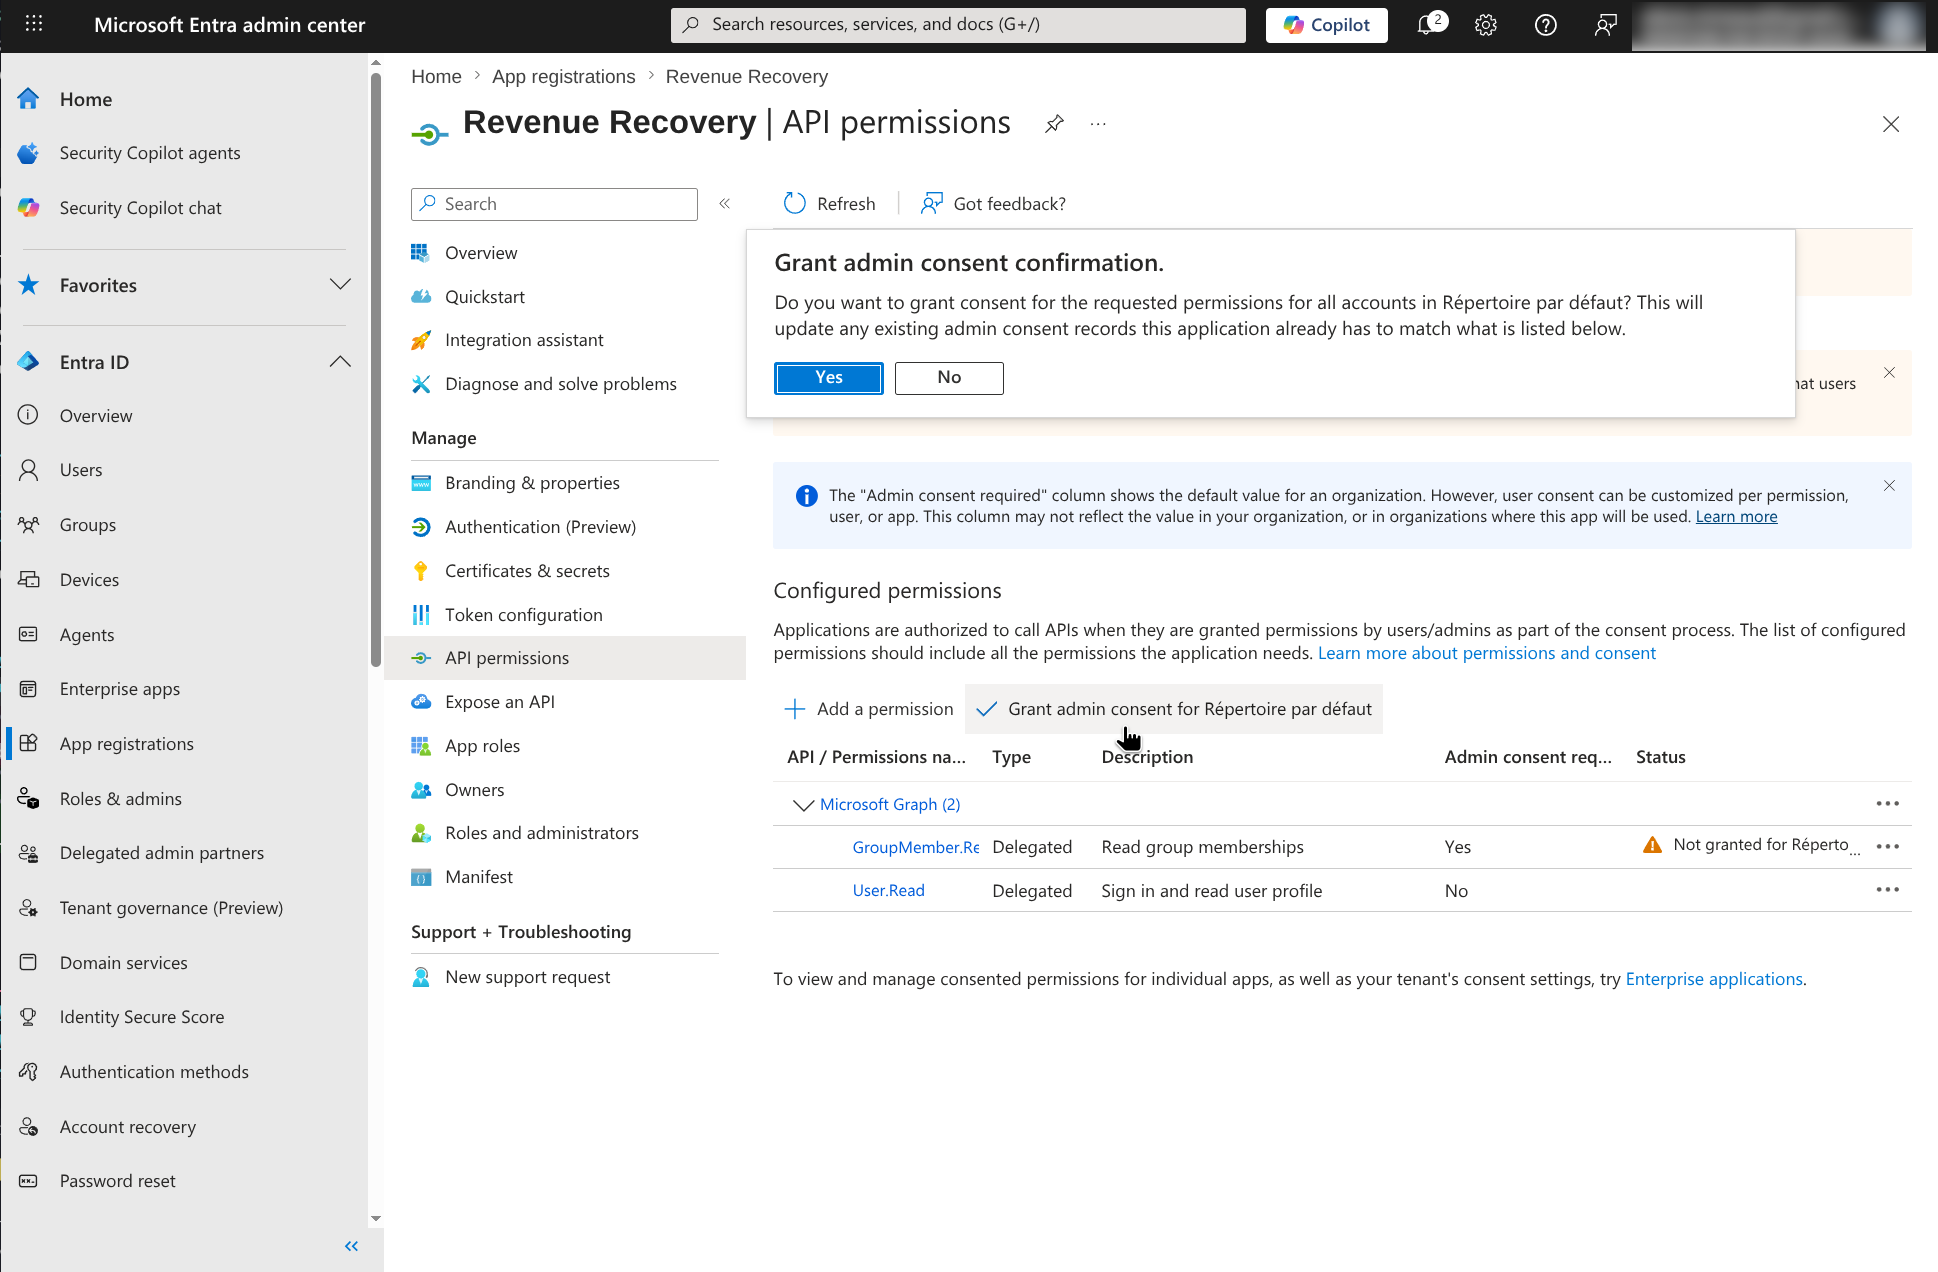 Grant tenant-wide admin consent so the app can use the required Microsoft Graph permissions
After consent is granted, confirm the permission status shows as granted for your tenant. If you skip this step, Revenue Recovery may authenticate the user but fail when validating permissions.
Step 5: Create a Client Secret
Open Certificates & secrets, then click New client secret.
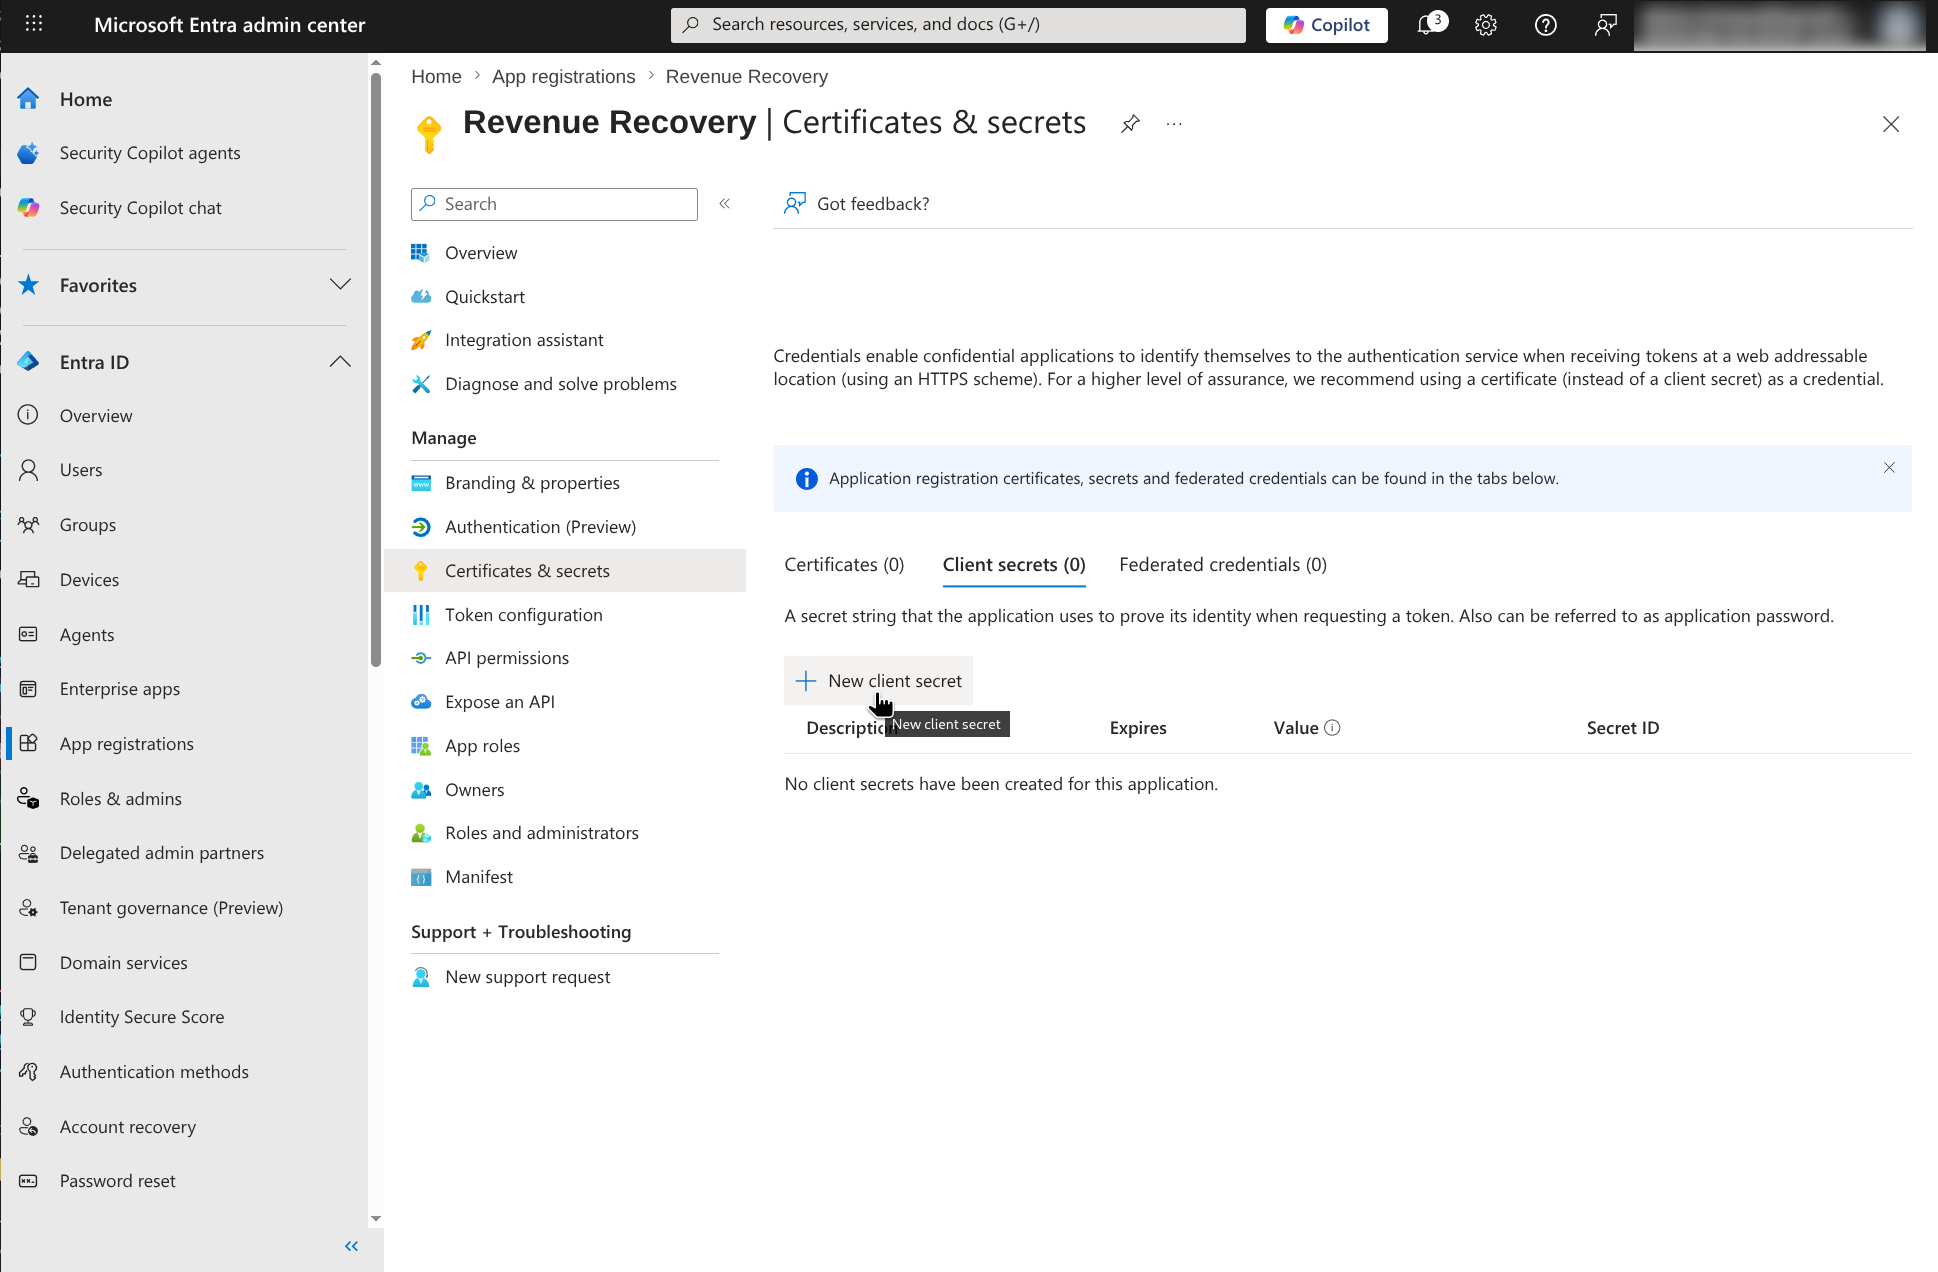 Open the Client secrets tab before creating the credential Revenue Recovery will use
Enter a description and choose an expiration period.
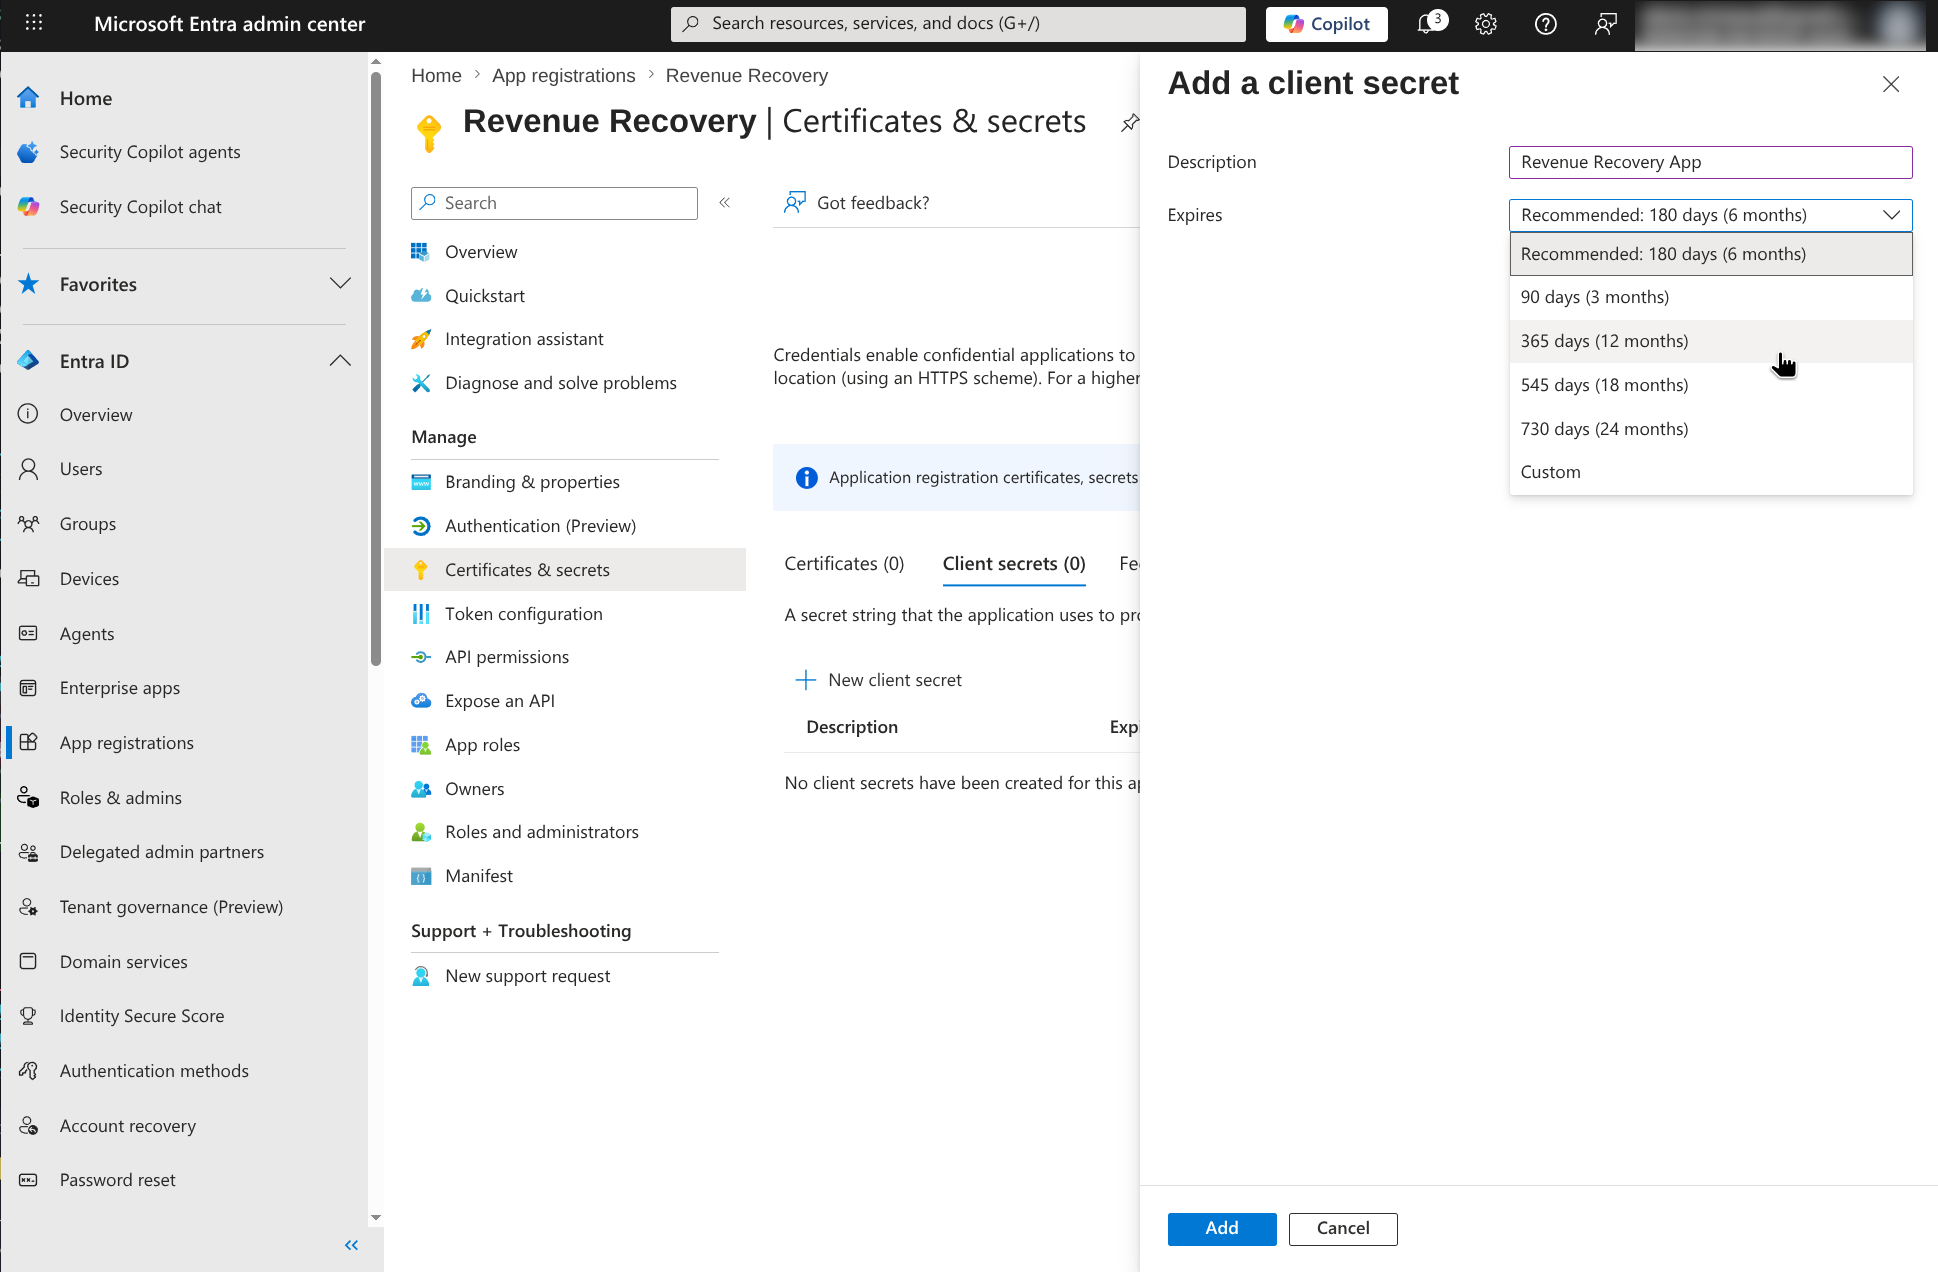 Create a client secret and choose an expiration period that fits your security policy
Once the secret is created, copy the Value immediately.
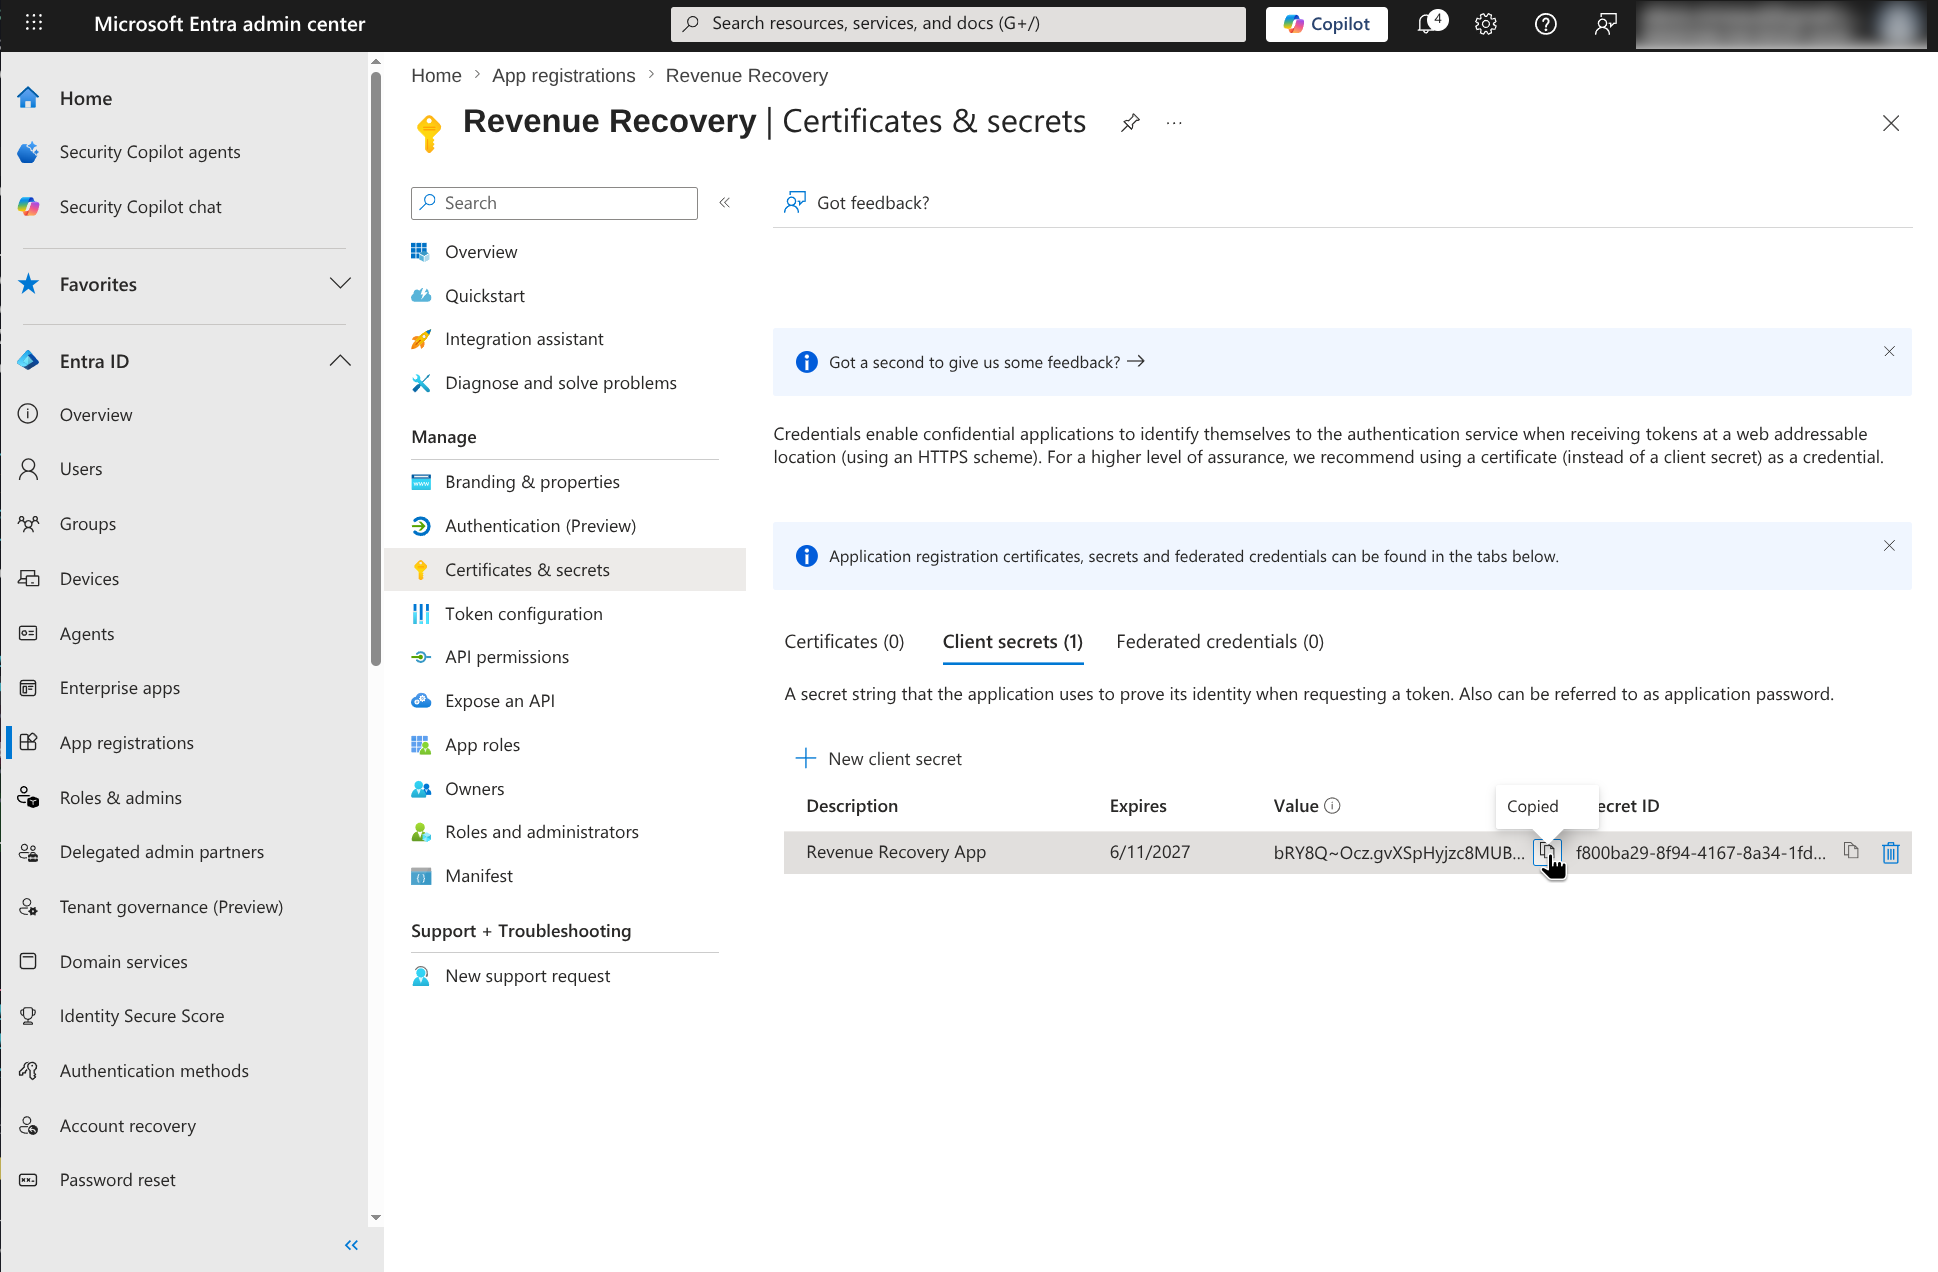 Copy the client secret Value right away; Microsoft only shows it once
Critical: Copy the Value, not the Secret ID. If you leave the page without saving the value somewhere secure, you must create a new secret.
Step 6: Copy the Tenant ID and Client ID
Open the app Overview page and copy the two identifiers Revenue Recovery needs:
- Directory (tenant) ID
- Application (client) ID
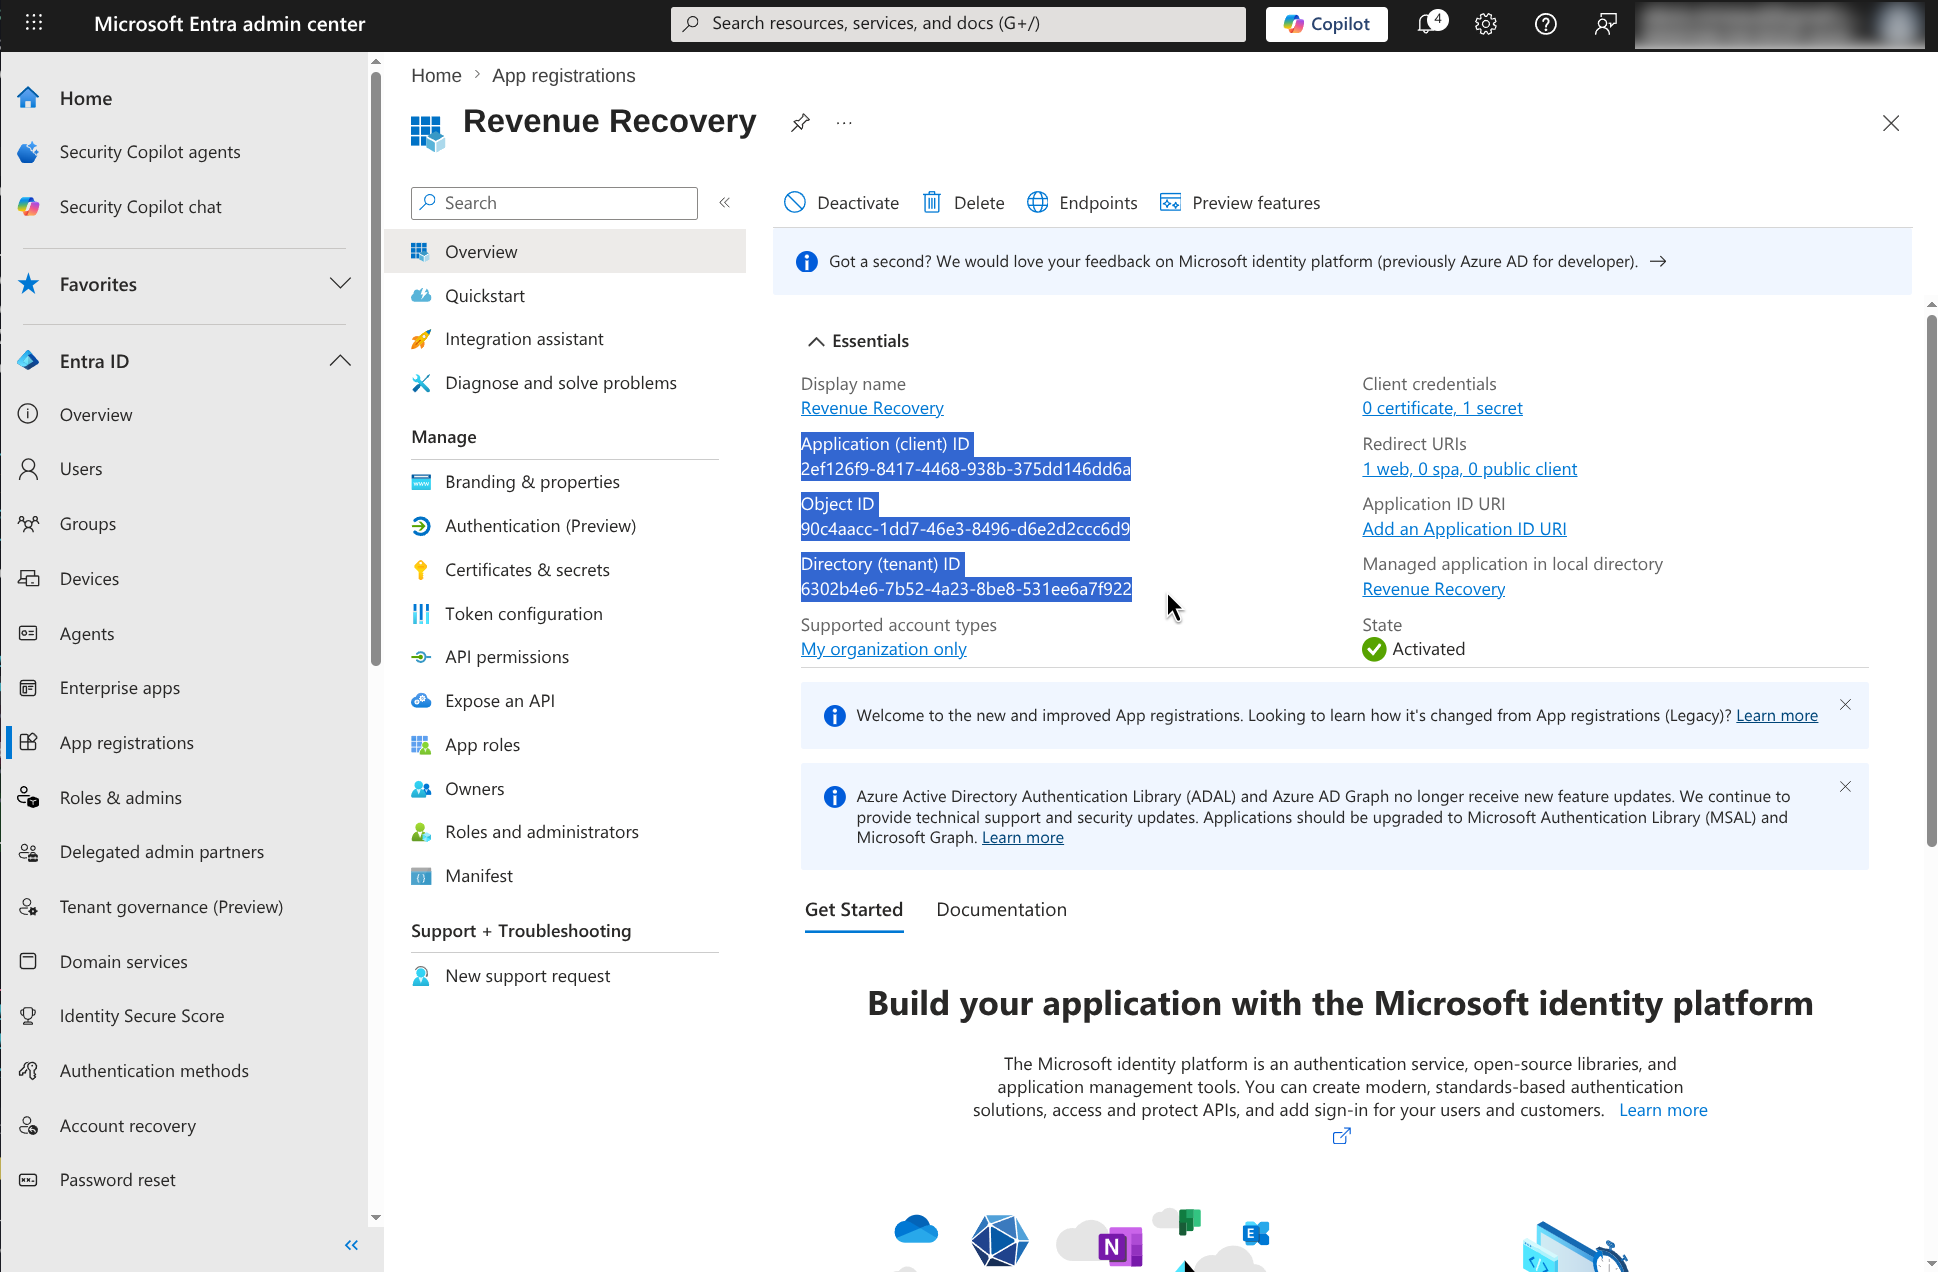 The app Overview page contains the Directory (tenant) ID and Application (client) ID required by Revenue Recovery
You do not need the Object ID for this Revenue Recovery setup.
Step 7: Enter the Credentials in Revenue Recovery
In Revenue Recovery, go to Configuration → Authentication → Status and enable Microsoft Entra ID.
 Open the authentication status page before enabling Microsoft Entra ID
Paste the values from Microsoft Entra:
- Tenant ID = Directory (tenant) ID
- Client ID = Application (client) ID
- Client Secret = client secret value
 Paste the three Entra values, then click Save and Enable
Click Save and Enable.
Step 8: Validate the Microsoft Sign-In Flow
Revenue Recovery opens a Microsoft sign-in validation flow. After successful authentication, the app verifies that the Entra configuration and permissions are valid.
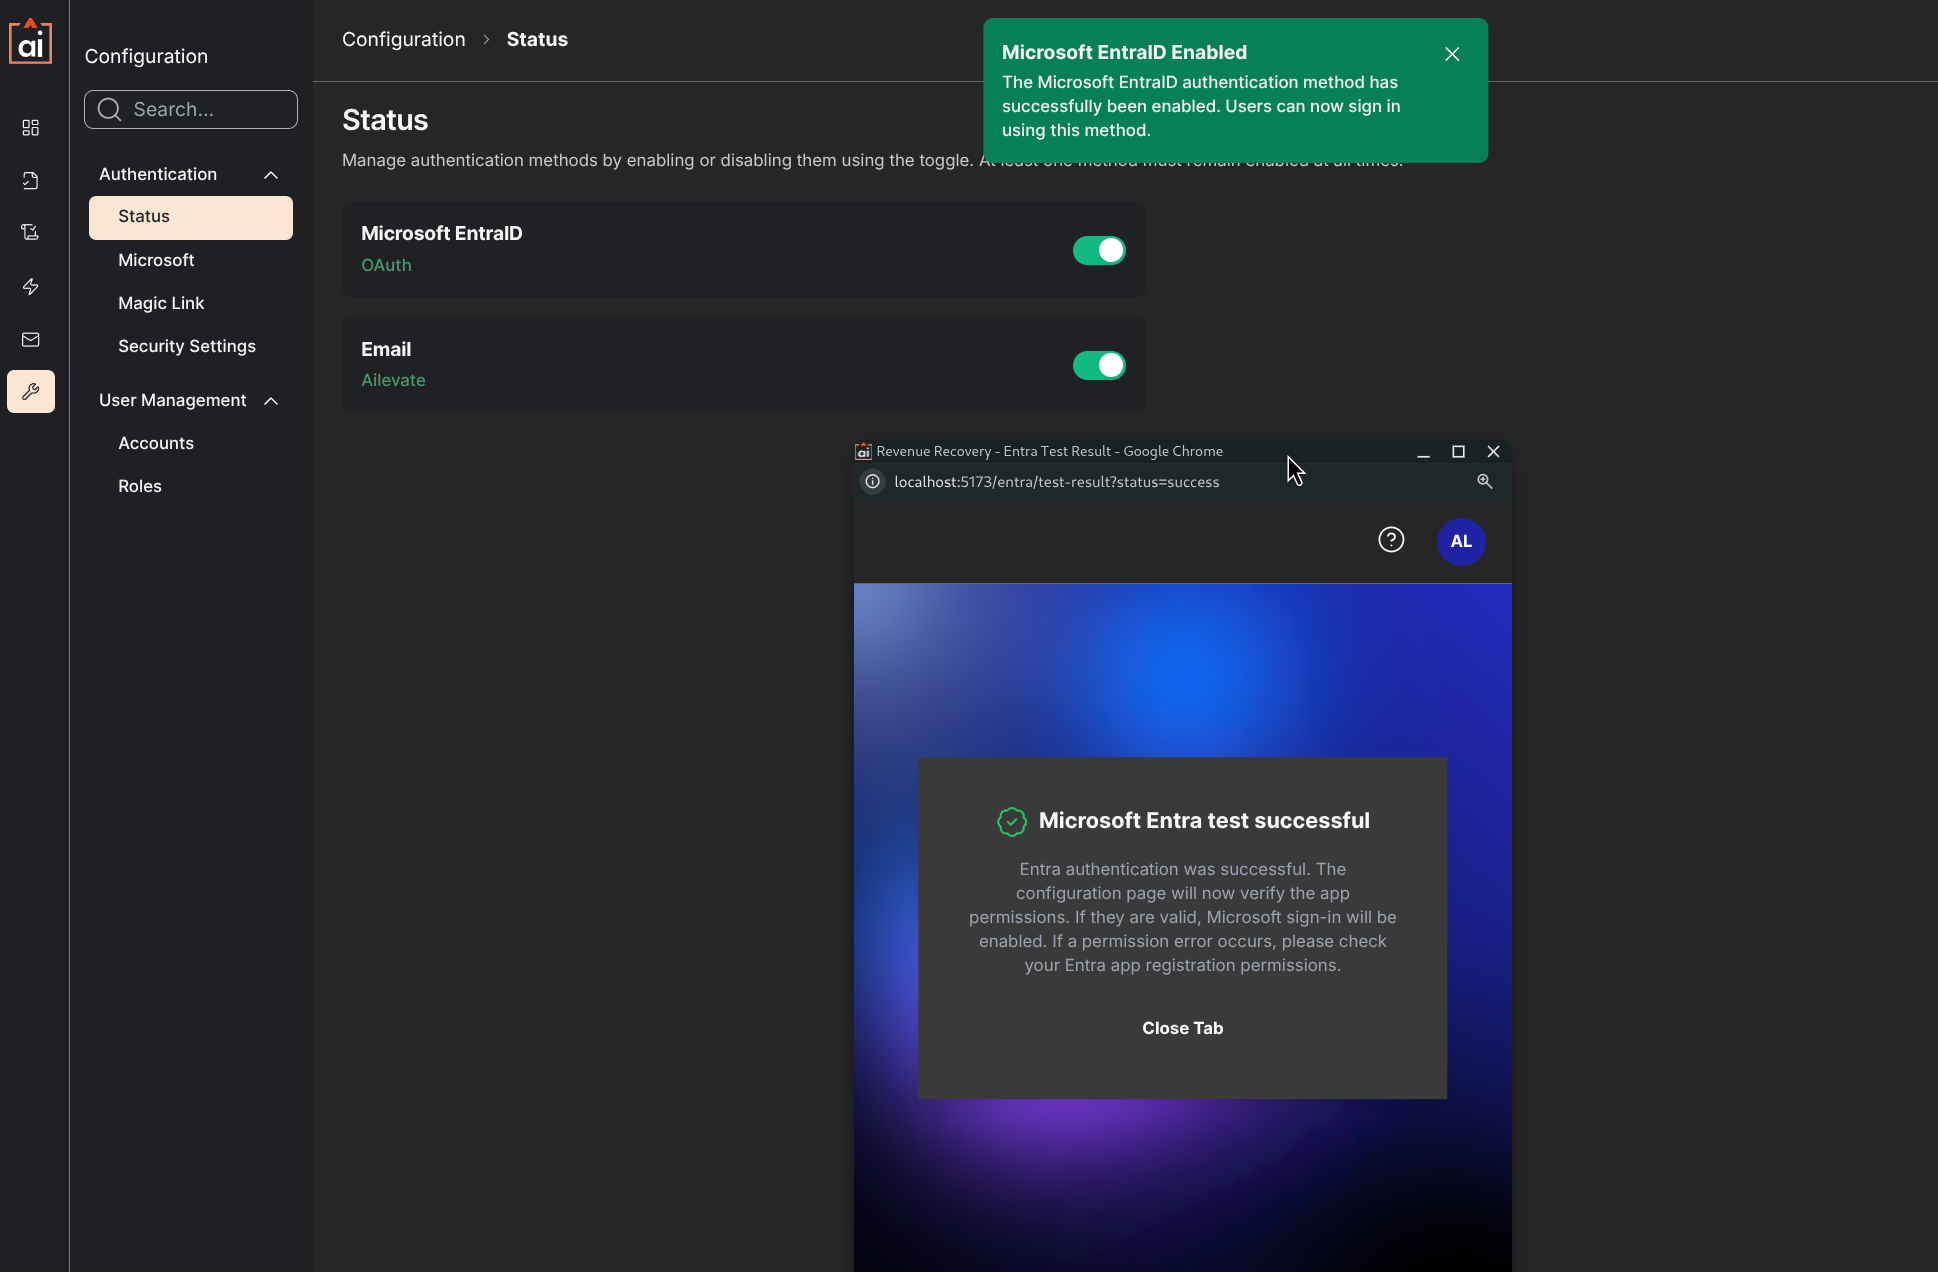 Successful validation confirms the Microsoft sign-in flow and required permissions are working
If validation succeeds, Microsoft Entra ID authentication is enabled for your Revenue Recovery environment.
After the Connection Works
At this point, Microsoft sign-in is enabled, but you may still want to configure the remaining authentication settings:
- Sign-Up: controls whether new users can be created through Entra sign-in
- Auto Login: skips the login selection screen and sends users directly to Microsoft
- Group-based Role Assignments: maps Entra groups to Revenue Recovery roles
- Default Role: assigns a fallback role to users who are not in a mapped group
For those settings, continue with Configuring Authentication.
Troubleshooting
"Must be a valid URL" when creating the app
Check that:
- The redirect URI starts with
https:// - You replaced the placeholder with your real Revenue Recovery host name
- The path is exactly
/api/auth/openid/return
Revenue Recovery says permission validation failed
Most often, one of these is missing:
- GroupMember.Read.All was not added
- Grant admin consent was not completed
- You selected the wrong permission type
Use Microsoft Graph → Delegated permissions → GroupMember.Read.All.
Microsoft sign-in fails after you paste the credentials
Verify that:
- Tenant ID matches Directory (tenant) ID
- Client ID matches Application (client) ID
- Client Secret is the copied Value, not the Secret ID
- The client secret has not expired
Group-based role mapping does not work
Successful sign-in does not automatically mean roles are mapped yet. After Entra sign-in is enabled, configure your group-to-role mappings in Revenue Recovery as described in Configuring Authentication.